
Orchids are often misunderstood as difficult to maintain, but they thrive indoors when their natural tropical environment is mimicked. Learning how to care for house orchids is actually quite simple once you understand their specific needs. By following a few fundamental rules, you can transform these elegant plants into long-lasting centerpieces for your home.
While many beginners fear killing their orchids, these resilient plants are much tougher than their delicate appearance suggests. They do not require constant attention, but they do demand consistency. Understanding their unique growth cycles and natural habitat is the secret to moving beyond basic survival and helping your collection flourish throughout the entire year.
This guide breaks down the essential care requirements for light, water, and humidity to help your house orchids bloom year after year. We will explore practical techniques for watering, choosing the right potting medium, and positioning your plants for optimal health. Get ready to master the art of indoor orchid cultivation with our step-by-step advice.

Understanding Light Requirements for Orchids
Light is the most critical factor in determining whether your orchid will thrive or merely survive. Most common household varieties, particularly the popular Phalaenopsis (moth orchid), are native to tropical forests where they grow in the dappled shade of tree canopies. Replicating this environment is the secret to consistent, healthy growth.
The golden rule for orchid light is “bright, indirect.” These plants require significant light to produce the energy needed for blooming, but their leaves are sensitive. Direct sunlight acts like a magnifying glass, quickly scorching the foliage and leaving unsightly, permanent brown patches.
To find the perfect spot in your home, consider these placement tips:
- East-facing windows: These are generally ideal, as they provide gentle morning sun that is rarely intense enough to burn the leaves.
- West-facing windows: These work well, but keep a close eye on the plant during late afternoon when the sun becomes stronger.
- Use a filter: If you only have a south-facing window, place the orchid a few feet back from the glass or hang a sheer curtain. This diffuses the harsh rays while maintaining the necessary brightness.
You can easily gauge if your orchid is receiving the correct amount of light by observing its leaves. A healthy, happy orchid will typically have medium-green, olive-colored foliage. If the leaves are a deep, dark forest green, the plant is likely not getting enough light and will struggle to produce new flower spikes. Conversely, if the leaves turn yellow or develop reddish tints, the plant is receiving too much direct exposure and should be moved further from the window.
Remember that light needs can fluctuate with the seasons. As the sun’s angle changes throughout the year, you may need to shift your orchid slightly to ensure it continues to receive the consistent, soft light it craves. By balancing intensity and duration, you provide the foundation for vibrant, long-lasting blooms.
Mastering the Watering Routine
Overwatering is the single most common reason orchids fail to thrive. Unlike many houseplants, orchids are typically epiphytes, meaning they grow on trees in nature and are accustomed to their roots breathing in the air. When roots remain constantly saturated in water, they suffocate and quickly succumb to root rot.
Do not follow a rigid calendar schedule, such as “every Monday.” Your home’s humidity, temperature, and light levels change throughout the year, meaning your plant’s thirst will fluctuate accordingly. Instead, rely on visual and tactile cues to determine when it is time to hydrate.
Use these simple methods to check if your orchid needs water:
- The Finger Test: Gently insert your finger about an inch into the potting medium. If it feels damp, wait a few more days. Only water when the medium feels dry to the touch.
- Root Color: Observe the roots through the pot. Healthy, hydrated orchid roots are vibrant green. When they turn a silvery-gray, it is a clear signal that the plant is ready for a drink.
- Pot Weight: Pick up the pot. A well-hydrated orchid will feel noticeably heavy; a dry one will feel surprisingly light.
When you do water, ensure your orchid is housed in a pot with generous drainage holes. Never allow the pot to sit in a saucer of standing water. After watering, let the excess liquid drain completely out of the bottom before returning the plant to its decorative cover pot or saucer. If you use a decorative cachepot, remove the inner plastic liner to water the plant in the sink, allowing it to drip-dry for fifteen minutes before replacing it.
By prioritizing airflow and ensuring the medium dries out slightly between waterings, you mimic the orchid’s natural environment. This simple shift in routine will significantly extend the lifespan of your plant and encourage consistent, healthy blooms.
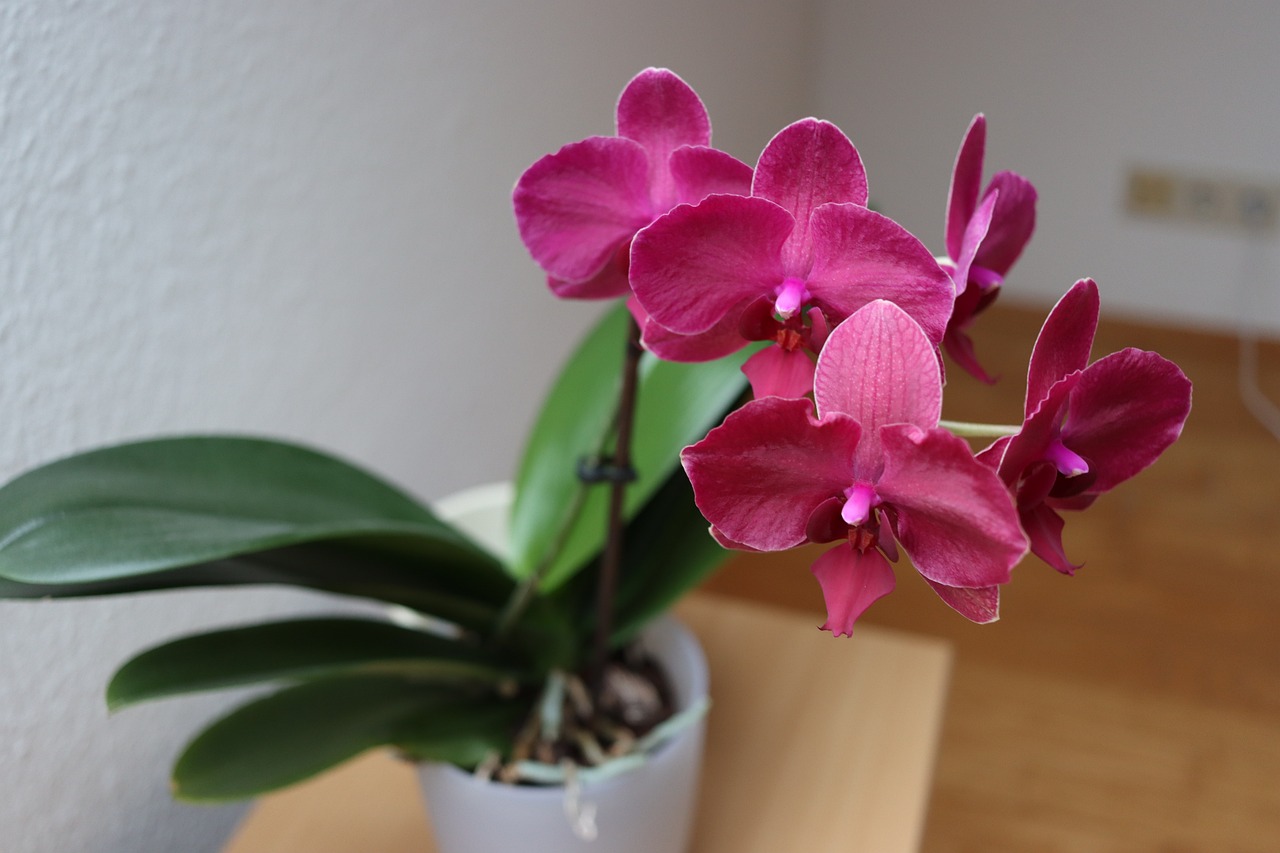
Temperature and Humidity Needs
Orchids are native to tropical environments, which means they thrive when their indoor surroundings mimic those conditions. To keep your orchid healthy and encourage repeat blooming, focus on balancing temperature and humidity levels within your home.
Most common house orchids, such as Phalaenopsis, prefer daytime temperatures between 65 and 80 degrees Fahrenheit. They generally enjoy a slight drop in temperature at night, which helps signal the plant to produce new flower spikes. Avoid placing your orchids near drafty windows, air conditioning vents, or heaters, as sudden temperature fluctuations can cause buds to drop prematurely.
Humidity is often the most challenging factor for indoor gardeners. While the average home is typically too dry for tropical plants, you can easily boost moisture levels in the air surrounding your orchid:
- Use a pebble tray: Place a shallow tray filled with pebbles and a small amount of water beneath your orchid pot. Ensure the bottom of the pot sits on the pebbles, not directly in the water, to prevent root rot. As the water evaporates, it creates a humid microclimate around the foliage.
- Group plants together: Placing your orchids near other houseplants creates a mini-ecosystem. As plants naturally release moisture through their leaves, the collective humidity in that area increases.
- Run a humidifier: If you have a large collection of orchids or live in a very dry climate, a room humidifier is the most effective solution. Aim for a humidity level between 50% and 70% for optimal growth.
Monitoring your orchid’s leaves can provide clues about its environment. If the leaf tips turn brown and crispy, the air is likely too dry. Conversely, if you notice soft, mushy spots, the humidity might be too high without adequate air circulation. Always ensure your plants have good airflow to prevent fungal issues, but avoid placing them directly in the path of a strong fan or breeze.
Safe Pruning and Maintenance Practices
Proper maintenance is essential for keeping your orchids healthy and encouraging future blooms. The most critical rule of orchid grooming is maintaining strict hygiene. Because orchids are susceptible to viral and bacterial infections, you must use clean, sharp pruning shears for every cut. Dull blades can crush plant tissue, creating entry points for pathogens, while dirty tools can easily transmit diseases between different plants in your collection.
Before and after every pruning session, sterilize your shears thoroughly using 70% isopropyl alcohol. Simply wiping the blades or dipping them in the solution ensures that any hidden bacteria or fungi are neutralized, protecting your orchid from potential infection.
When you are ready to prune, follow these safety and maintenance steps:
- Prepare your workspace: Work on a stable, well-lit surface. Proper lighting allows you to clearly distinguish between healthy green tissue and dried, brown, or hollow stems that need removal.
- Protect your skin: If you have sensitive skin or are prone to contact dermatitis, wear gardening gloves. Some orchid species have sharp edges or may release sap that can cause minor irritation.
- Make clean cuts: Always cut at a slight angle to prevent water from pooling on the fresh wound, which can lead to rot. Only remove stems that have turned completely brown or yellow, as green stems may still be capable of producing new growth or spikes.
- Dispose of debris: Do not leave pruned plant matter in the pot. Decaying organic material attracts pests like fungus gnats and promotes mold growth on the surface of the orchid medium.
By treating each pruning session as a clinical task rather than a casual chore, you significantly reduce the risk of plant stress. Always observe your orchid closely after maintenance; a plant that has been groomed with sterile tools and proper technique will recover quickly and redirect its energy toward developing strong roots and vibrant, long-lasting flowers.

Troubleshooting Common Orchid Issues
If your orchid stops blooming or begins to show signs of distress, resist the urge to immediately reach for fertilizer. Over-fertilizing a stressed plant can cause further damage to the root system. Instead, conduct a systematic evaluation of your environment to identify the root cause of the issue.
Start by inspecting the leaves and stems for common houseplant pests. Mealybugs, which appear as small, white, cotton-like clusters, are frequent offenders. If you spot them, do not panic. You can effectively remove them by gently wiping the affected areas with a cotton swab dipped in isopropyl alcohol. Always test a small area of the leaf first to ensure the plant does not react negatively.
Yellowing leaves often indicate an issue with your watering routine or light exposure. Before adjusting your care, check for these common red flags:
- Root health: Gently lift the plant from its pot to inspect the roots. Healthy orchid roots should be firm and green or silvery-white. If they appear brown, mushy, or hollow, you are likely overwatering.
- Light levels: If leaves are a dark, forest green, the orchid is likely not receiving enough light to trigger blooming. Move it to a brighter location, but avoid direct, harsh sunlight, which can scorch the foliage.
- Drainage: Ensure your pot has adequate drainage holes. Orchids should never sit in standing water, as this leads to rapid root rot.
If your orchid remains unhealthy despite providing the correct light and water, it may be time to repot. Over time, the organic medium—typically orchid bark—breaks down and loses its ability to provide proper aeration. Repotting in fresh, high-quality orchid bark refreshes the root system, improves oxygen flow, and provides the stability necessary for the plant to recover. When repotting, trim away any dead or decaying roots with sterilized shears to give the plant a clean start in its new environment.

Dedicated team of gardening enthusiasts with years of hands-on experience testing lawn mowers, gardening tools, and outdoor equipment. We help home gardeners and professionals alike make informed buying decisions with honest, thorough reviews. From push mowers to pruning shears, we test it all so you don’t have to. Got a gardening tool you’d like us to review? Get in touch!