
Spider mites are tiny, destructive pests that can quickly devastate a healthy garden. Understanding how they feed and damage plant tissue is the first step toward saving your greenery. These microscopic arachnids pierce individual plant cells to extract vital fluids, causing leaves to yellow, wither, and eventually drop off if left untreated.
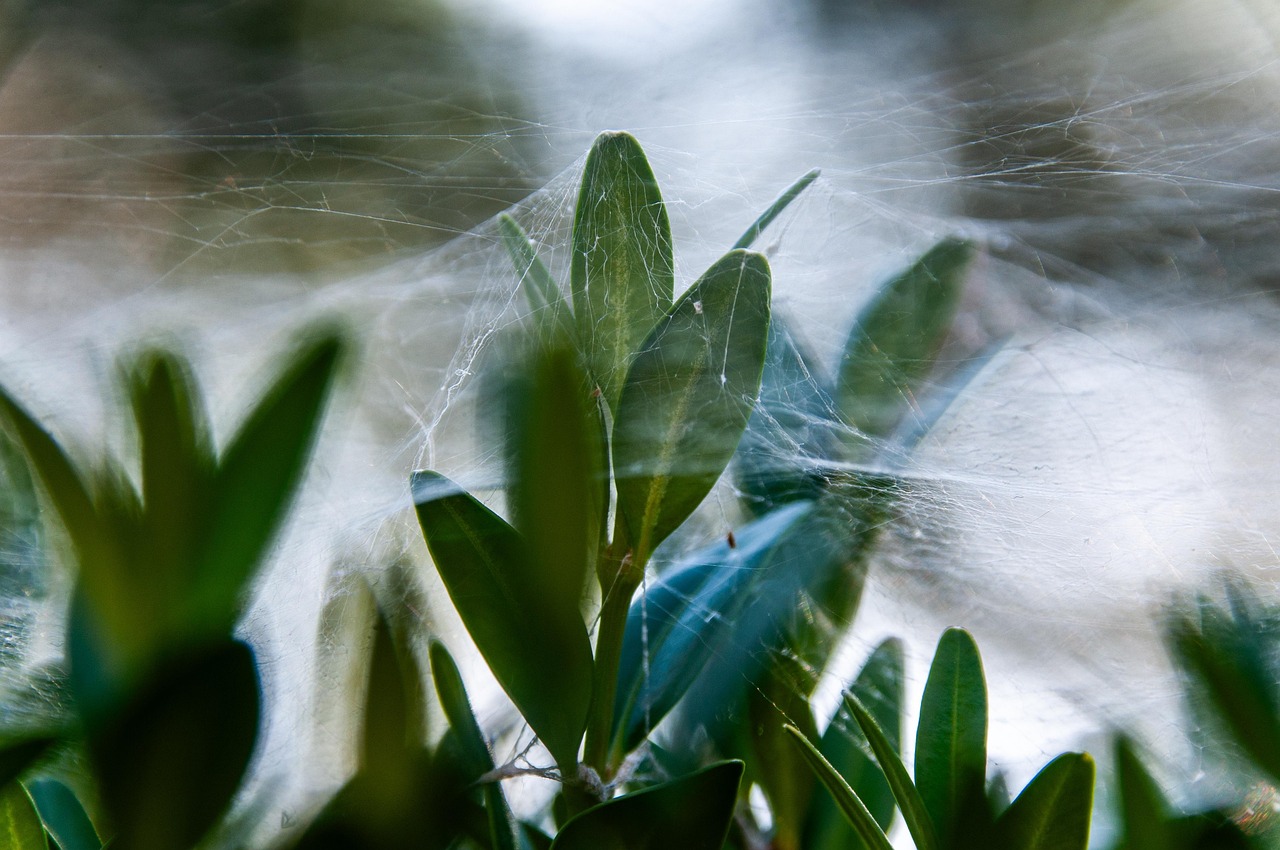
Because these pests thrive in hot, dry conditions and reproduce rapidly, an infestation can spiral out of control before you even notice the damage. While they are difficult to spot with the naked eye, their presence is often revealed by fine, silken webbing. Recognizing these early warning signs is essential for effective intervention.
This guide explains the mechanics of a spider mite infestation and provides actionable steps to protect your plants. You will learn how to identify the specific damage patterns, implement preventative cultural practices, and utilize safe, practical treatments to eliminate these invaders. Follow these expert tips to restore your garden’s health and vitality today.

The Mechanics of Damage How Spider Mites Feed
Spider mites are not insects; they are tiny arachnids related to spiders and ticks. Because of their microscopic size, they often go unnoticed until significant damage has already occurred. Understanding their feeding mechanics is the first step in protecting your garden.
These pests possess specialized, needle-like mouthparts called chelicerae. When they settle on a leaf, they use these structures to pierce individual plant cells. They then feed by extracting the internal sap, which contains the essential fluids and nutrients the plant needs to thrive.
The primary damage occurs because spider mites specifically target the cells responsible for photosynthesis. By draining the chlorophyll—the pigment that gives leaves their green color—they effectively starve the plant of its ability to convert sunlight into energy. This process creates a distinct pattern of injury:
- Stippling: You will first notice tiny, pale yellow or white dots on the leaf surface, which are the sites where cells have been emptied.
- Chlorosis: As feeding continues, these dots merge, causing the leaves to turn yellow, bronze, or grey.
- Desiccation: Without adequate fluids or energy, the leaves lose their structural integrity, becoming dry and brittle.
As an infestation grows, the cumulative loss of nutrients puts the plant under extreme physiological stress. A plant struggling to photosynthesize cannot produce the energy required to repair its tissues or defend itself against other pathogens. If left unchecked, the foliage will eventually wither, curl, and drop off entirely.
Because spider mites reproduce rapidly in warm, dry conditions, their feeding damage can escalate from minor leaf spotting to total plant collapse in just a few weeks. Early detection is vital; if you spot the characteristic “stippling” on your indoor or outdoor plants, inspect the undersides of the leaves immediately. Look for fine webbing, which often acts as a protective nursery for the colony, and take swift action to isolate the affected plant before the mites spread to your healthy collection.
Identifying the Signs of an Infestation
Catching a spider mite infestation early is the single most effective way to save your plants. Because these pests are microscopic, they often go unnoticed until they have already caused significant damage. By the time you see their signature webbing, the population is usually well-established, making treatment more difficult.
Before the webs appear, look closely at the foliage for “stippling.” This appears as tiny, pale yellow or white dots on the surface of the leaves. These spots are actually the result of mites piercing individual plant cells to feed on the sap. If you notice your leaves looking dull, losing their vibrant color, or developing a dusty appearance, inspect them immediately.
To confirm the presence of mites, use the white paper test:
- Select a leaf that appears damaged or discolored.
- Hold a clean sheet of white paper directly underneath the leaf.
- Gently tap or shake the stem or the underside of the leaf.
- Examine the paper closely for tiny, moving specks that resemble grains of pepper.
If you see these specks crawling, you have an active infestation. Spider mites thrive in hot, dry environments, so frequently checking plants that are located near heaters or in sunny, stagnant corners is a vital part of proactive plant care. If you find them, isolate the affected plant immediately to prevent the mites from spreading to your healthy greenery.
Remember that healthy plants are more resilient. While spider mites can attack any plant, they are particularly drawn to those suffering from drought stress. Maintaining consistent watering habits and occasionally wiping down leaves with a damp cloth can remove dust and small populations of mites before they have a chance to multiply. By staying observant and acting the moment you see the first signs of stippling, you can stop these pests before they compromise the health of your indoor or outdoor garden.

Step by Step Treatment for Infested Plants
If you suspect a spider mite infestation, speed is essential. These pests multiply rapidly and spread to neighboring plants through air currents or physical contact. Your first action must be to isolate the infested plant. Move it to a separate room or a dedicated quarantine area away from your healthy collection to break the cycle of transmission.
Once isolated, you need to physically reduce the mite population. Spider mites thrive in dry, dusty conditions, so a thorough cleaning is highly effective. Take the plant to a sink, shower, or outdoors if the weather is warm.
Follow these steps for physical removal:
- Use a steady, lukewarm stream of water to rinse the entire plant.
- Focus specifically on the undersides of leaves, as this is where mites congregate and lay eggs.
- Gently wipe down stems and leaf axils where webs may be hidden.
- Allow the foliage to air dry completely before returning the plant to bright light to prevent fungal issues.
For persistent or heavy infestations, mechanical washing alone may not be enough. If you still see webbing or active mites after a few days, introduce a chemical control. Insecticidal soaps or neem oil are effective, low-toxicity options that disrupt the mites’ life cycle. Always read the manufacturer’s label for specific dilution rates and application frequency.
Safety is a priority when applying any treatment, even organic ones. Always wear protective gloves and eye protection to prevent skin or eye irritation. Ensure you are working in a well-ventilated area.
Consistency is the final key to success. Because these treatments often only kill active mites and not the eggs, you must repeat the application every five to seven days for at least three weeks. This schedule ensures that newly hatched mites are neutralized before they reach maturity and begin reproducing. Monitor your plant closely throughout this period, keeping it isolated until you are certain the infestation has been completely eradicated.
Preventing Future Outbreaks in Your Garden
Spider mites thrive in hot, dry, and dusty environments, making your indoor and outdoor plants prime targets if conditions are neglected. To prevent future outbreaks, you must focus on creating an environment that discourages these pests while promoting overall plant health.
Consistency is your best defense. Spider mites are attracted to drought-stressed plants, which produce higher levels of nitrogen and sugars that mites find irresistible. Ensure your plants receive adequate, consistent watering based on their specific needs. Check the soil moisture regularly rather than following a rigid schedule, as environmental factors like sunlight and temperature can change water requirements daily.
Beyond watering, focus on these practical maintenance steps to keep your garden inhospitable to mites:
- Wipe leaves regularly: Dust acts as a protective shield for spider mites and hinders photosynthesis. Use a soft, damp cloth to gently wipe both the tops and undersides of leaves every two weeks. This removes debris and physically disrupts any early-stage mite colonies.
- Increase ambient humidity: Mites struggle to reproduce in humid conditions. If you are gardening indoors, use a humidifier or group plants together to create a localized microclimate. For outdoor container plants, misting the foliage early in the morning can create a temporary barrier against infestation.
- Improve air circulation: While mites like dry air, stagnant air pockets can encourage various pests and fungal issues. Ensure your plants are not overcrowded, allowing air to move freely around the foliage.
- Inspect new arrivals: Always quarantine new plants for at least two weeks before placing them near your established collection. Examine the undersides of leaves with a magnifying glass to ensure you aren’t introducing hidden pests into your home.
Finally, keep a close eye on plant health. Healthy, well-hydrated plants have stronger cell walls that are harder for mites to penetrate. By maintaining these simple hygiene and hydration habits, you create a robust garden that naturally resists spider mite colonization, saving your plants from the devastating effects of an infestation.
Common Questions and When to Seek Help
Determining if a plant can be saved from a severe spider mite infestation requires a careful inspection. Do not discard a plant simply because it looks wilted or has dropped its leaves. Instead, perform a scratch test on the stems.
Using your fingernail or a small knife, gently scrape a tiny portion of the outer bark on the main stem. If the tissue underneath is green and moist, the plant is still alive and has the potential to recover with proper treatment. If the stem is brown, dry, and brittle all the way through, the plant has likely succumbed to the damage.
If you are struggling to identify the extent of the damage or are dealing with a rare, expensive specimen, professional guidance is a wise investment. You should consider reaching out to the following resources for specialized advice:
- Local University Extension Offices: These provide science-based horticultural advice and can often help diagnose specific pest issues in your region.
- Certified Arborists: For large indoor trees or outdoor shrubs, an arborist can provide professional pest management strategies that go beyond standard home remedies.
- Local Plant Nurseries: Experienced nursery staff can often visually confirm if a plant is worth saving or if it poses a risk of spreading mites to your healthy collection.
If you decide to treat the plant, always prioritize safety. When using insecticidal soaps, neem oil, or other pest management products, follow the label instructions exactly. These chemicals are designed to disrupt biological processes, which can be harmful to humans and animals if misused.
Always store gardening chemicals in their original containers, clearly labeled, and kept in a secure location high up or in a locked cabinet. Ensure these supplies are completely out of reach of children and pets at all times. If a plant is too far gone to save, discard it immediately in a sealed bag to prevent the spider mites from migrating to your other healthy plants.

Dedicated team of gardening enthusiasts with years of hands-on experience testing lawn mowers, gardening tools, and outdoor equipment. We help home gardeners and professionals alike make informed buying decisions with honest, thorough reviews. From push mowers to pruning shears, we test it all so you don’t have to. Got a gardening tool you’d like us to review? Get in touch!