
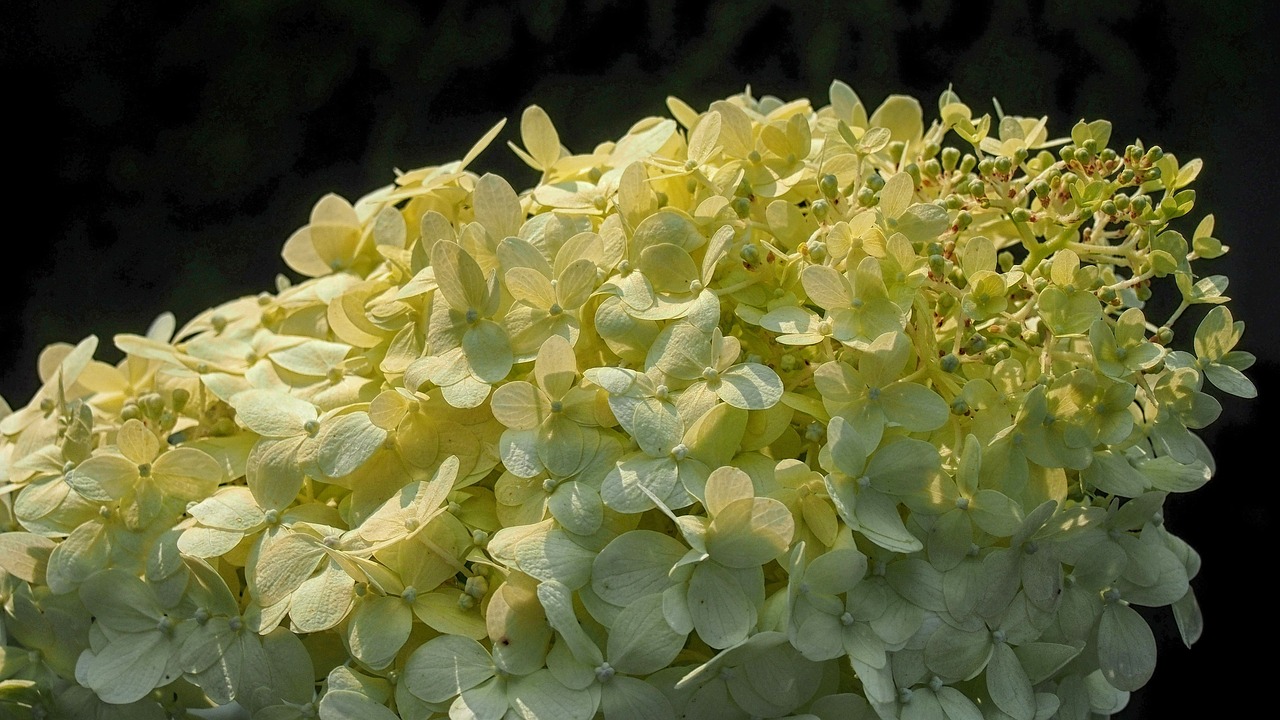
To plant a hydrangea, dig a hole twice as wide as the root ball and just as deep, ensuring the crown sits level with the soil surface. Backfill with rich, well-draining soil and water thoroughly to eliminate air pockets. Hydrangeas are a staple in many landscapes, known for their stunning, voluminous blooms.
Whether you are adding a mophead or a panicle variety to your garden, planting them correctly is the key to long-term success. While these shrubs are relatively hardy, they require specific light and moisture conditions to thrive. Understanding your local climate and soil pH will help you achieve those vibrant, show-stopping colors.
This guide walks you through the essential steps to get your new hydrangea established in the ground effectively. We cover everything from selecting the perfect site to proper mulching techniques that protect roots. Follow these practical tips to ensure your new garden addition remains healthy, hydrated, and ready to produce beautiful flowers for seasons.

Choosing the Best Time and Location
Timing is critical for the long-term success of your hydrangea. The best windows for planting are during the mild temperatures of spring or early autumn. These seasons allow the root system to establish itself in the soil before the plant faces the stress of extreme summer heat or the dormant, frozen conditions of winter.
Selecting the right location is equally important for preventing leaf scorch and dehydration. While specific requirements vary by cultivar, most hydrangeas thrive in a spot that receives:
- Morning Sun: Soft, early light encourages healthy growth and better bloom production.
- Afternoon Shade: Protection from intense midday and late-afternoon sun is essential to prevent wilting and burnt foliage.
Before you dig, evaluate your soil quality. Hydrangeas are thirsty plants, but they do not tolerate “wet feet.” If your soil is heavy clay, it will likely hold too much water, which can lead to root rot. If your soil is sandy, it may drain too quickly, leaving the plant dehydrated.
To create the ideal growing environment, amend your native soil with organic matter, such as high-quality compost or aged manure. This improves drainage in heavy soils while increasing water retention in sandy ones. Additionally, organic matter provides a slow-release nutrient boost that supports vigorous root development.
When choosing your site, also consider the mature size of the variety you have purchased. Hydrangeas can grow quite large over time, so ensure you provide enough space for air circulation between the shrub and any neighboring plants or structures. Proper spacing helps prevent fungal issues, such as powdery mildew, by allowing moisture to evaporate from the leaves after rainfall.
By prioritizing a location with filtered light and nutrient-rich, well-draining soil, you provide your hydrangea with the foundation it needs to bloom reliably year after year. Always check the specific tag that came with your plant, as some newer varieties are bred to tolerate more sun than traditional types.
Preparing Your Tools and Safety
Before you begin digging, gathering the right equipment ensures a smoother planting process. Having your supplies within arm’s reach prevents unnecessary trips and keeps you focused on the task. For a successful hydrangea installation, ensure you have the following items ready:
- Sturdy shovel: A sharp, clean spade makes cutting through sod and breaking up compacted soil much easier.
- Gardening gloves: Choose a heavy-duty pair to protect your skin from soil irritants, thorns, or hidden sharp debris in the ground.
- Compost: Hydrangeas thrive in nutrient-rich, well-draining soil; have a bag of high-quality organic compost ready to mix into your planting hole.
- Watering tool: A hose with a gentle spray nozzle or a large watering can is essential for immediate hydration after planting.
Safety should always be your priority when working with landscaping tools. When operating your shovel, maintain a wide, stable stance to keep your center of gravity low, which helps prevent lower back strain. Always keep your feet positioned well clear of the shovel blade to avoid accidental injury.
If your hydrangea arrived with long, unruly branches or damaged stems, you may need to use pruning shears before planting. Always follow basic safety protocols: cut away from your body at all times to prevent slips. If you are working on a slope, ensure your footing is secure before applying pressure to any tool.
Once you are finished with your preparation or planting, take a moment to clean and store your tools securely. Leaving a shovel or shears in the grass creates a significant trip hazard and can lead to rust. By organizing your workspace and respecting the potential hazards of gardening equipment, you protect yourself while setting your new hydrangea up for a healthy start in its permanent home.
Digging the Hole and Preparing the Soil
The foundation of a thriving hydrangea begins with the preparation of its planting site. Before you begin digging, ensure you have selected a location that receives the appropriate light for your specific variety, typically morning sun and afternoon shade.
When digging your hole, precision is key to root development. Aim to make the hole at least twice as wide as the current root ball. However, keep the depth consistent with the height of the container. Planting too deeply can bury the crown, potentially leading to stem rot and stunted growth. The goal is for the top of the root ball to sit level with the surrounding soil surface.
If your garden features heavy clay soil, you must improve its structure before planting. Clay often retains too much moisture, which can suffocate hydrangea roots. Incorporate organic compost or aged manure into the native soil you removed. This amendment improves drainage and adds essential nutrients, creating a hospitable environment for new roots to expand.
Follow these steps to finish preparing the hole:
- Loosen the base: Use your shovel or a garden fork to gently loosen the soil at the very bottom of the hole. This breaks up compaction and allows roots to penetrate downward more easily.
- Check the depth: Place your hydrangea in the hole to check the height. If it sits too low, add a small amount of the amended soil back into the bottom until the top of the root ball is flush with the ground level.
- Remove debris: Clear away any large rocks, sticks, or weeds from the excavated soil before using it to backfill.
By taking the time to create a wide, well-draining, and properly leveled home for your hydrangea, you provide the plant with the stability it needs to establish a strong root system. Proper preparation now significantly reduces the risk of transplant shock and ensures your shrub is set up for long-term health and vibrant seasonal blooms.
Planting and Initial Watering
Before you begin, ensure your planting hole is twice as wide as the container and exactly as deep. This provides a loose environment for roots to expand without burying the stem too deeply, which can lead to rot.
To remove the hydrangea from its nursery pot, turn it sideways, place your hand over the soil surface with the main stem between your fingers, and gently squeeze the sides of the container. If the plant is stuck, tap the bottom of the pot rather than pulling on the stems. Once removed, inspect the root ball:
- If you see roots circling tightly around the edges, use your fingers to gently tease them outward. This encourages the roots to grow into the surrounding native soil rather than continuing to grow in a restrictive circle.
- If the roots are severely matted, make a few shallow vertical cuts with a clean knife to stimulate new growth.
Place the hydrangea in the center of your prepared hole. The top of the root ball should sit perfectly level with the surrounding ground. If it is too low, add a bit of soil back into the bottom; if it is too high, remove a small amount of earth. Planting too deeply is a common mistake that can suffocate the plant.
Once positioned, fill the remaining space with your soil mixture. As you fill, use your hands to firm the soil down gently around the base. Avoid stomping or packing the earth too tightly, as you want to remove large air pockets while still allowing for proper drainage and aeration.
Finally, provide a deep, thorough watering immediately after planting. Direct the water at the base of the plant, soaking the entire root zone until the water begins to pool slightly. This critical step settles the soil around the roots, eliminating hidden air gaps and helping the hydrangea establish immediate contact with its new home. Monitor the moisture levels daily for the first two weeks, especially during hot or windy weather.

Aftercare and Common Questions
Once your hydrangea is in the ground, consistent moisture is the key to establishment. During the first growing season, water your plant deeply at least two to three times per week. The soil should feel damp to the touch, similar to a wrung-out sponge, but never waterlogged. Over-saturation can lead to root rot, so ensure your planting site has adequate drainage.
Applying a layer of organic mulch, such as shredded bark or pine needles, is highly recommended. A two- to three-inch layer helps retain soil moisture, regulates temperature, and suppresses competing weeds. To prevent rot and fungal issues, keep the mulch a few inches away from the main stem of the shrub.
Monitor your plant closely during its first year. If you notice the following, take immediate action:
- Wilting despite regular watering: This often indicates either poor drainage or extreme heat stress. Check the soil moisture levels before adding more water.
- Yellowing leaves: This is frequently a sign of overwatering, though it can also indicate nutrient deficiencies or improper soil pH.
- Pest or disease damage: Look for discolored spots, holes in leaves, or visible insects.
If you encounter persistent issues that do not resolve with basic adjustments, avoid aggressive chemical treatments. Instead, contact your local university cooperative extension office. They provide region-specific expertise and can help identify local pests or soil conditions that might be affecting your plant. A professional horticulturist can also offer tailored advice for specific hydrangea varieties, such as Hydrangea macrophylla or Hydrangea paniculata, which may have unique care requirements.
By keeping the base clean, monitoring soil moisture, and seeking expert guidance when problems arise, you set your hydrangea up for long-term health and vibrant blooms. Patience is essential; while hydrangeas are resilient, they thrive best when their environment remains stable during their initial adjustment period in your garden.

Dedicated team of gardening enthusiasts with years of hands-on experience testing lawn mowers, gardening tools, and outdoor equipment. We help home gardeners and professionals alike make informed buying decisions with honest, thorough reviews. From push mowers to pruning shears, we test it all so you don’t have to. Got a gardening tool you’d like us to review? Get in touch!