
Planting hyacinth bulbs is a rewarding way to ensure vibrant, fragrant color in your spring garden. To achieve the best results, you must plant them in the fall, several weeks before the ground freezes, so they can establish strong roots. Proper timing is essential for these hardy perennials to bloom beautifully when spring arrives.
While hyacinths are relatively easy to grow, they do require specific conditions to reach their full potential. They thrive in locations with well-draining soil and plenty of sunlight, though they can tolerate partial shade. Understanding these environmental needs helps prevent common issues like bulb rot, ensuring your garden remains healthy and visually stunning.
This guide covers the ideal timing, soil preparation, and planting techniques to help your bulbs thrive year after year. We will walk you through the necessary steps, from selecting the right spot to achieving the correct planting depth. Follow these practical tips to enjoy a spectacular, long-lasting display of fragrant hyacinth blooms every single season.
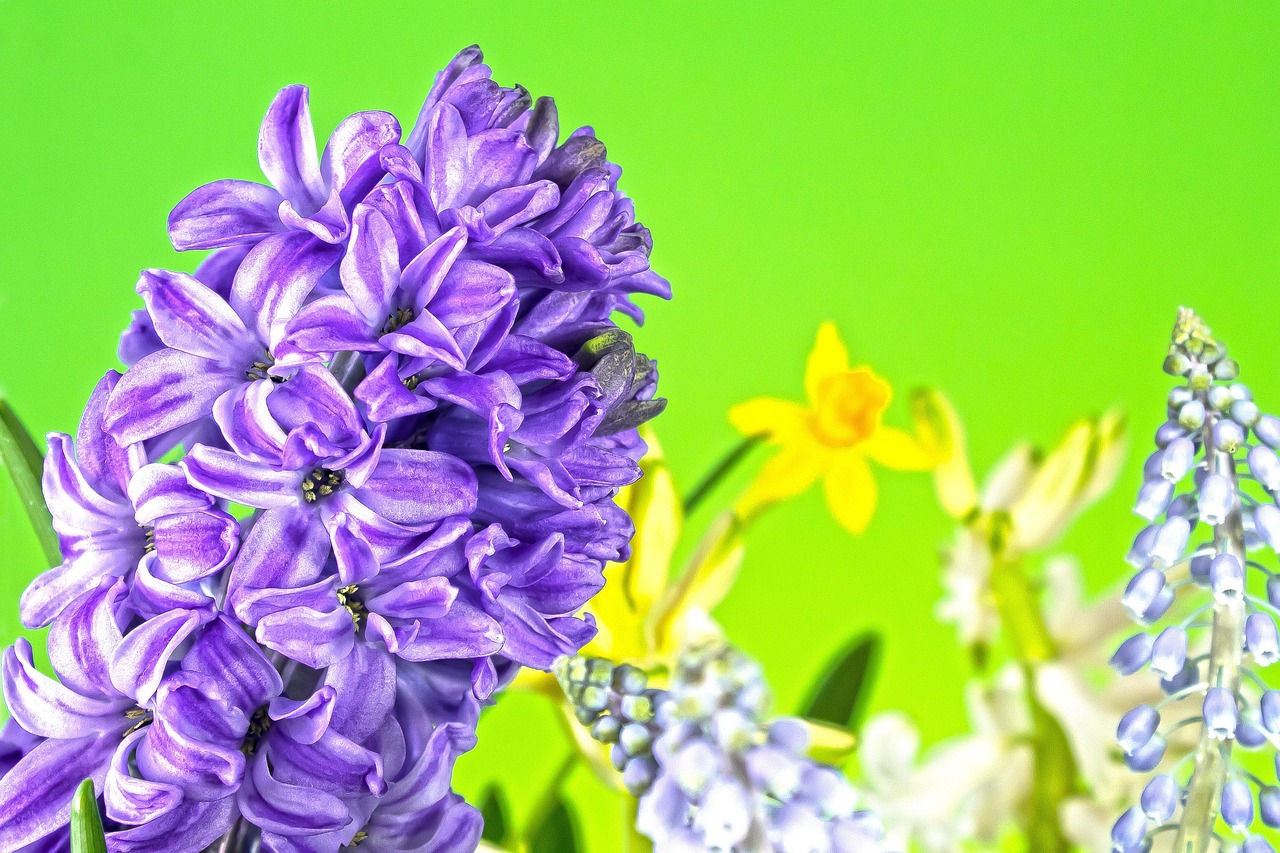
The Best Time to Plant Hyacinth Bulbs
Timing is the most critical factor for a successful hyacinth display. These bulbs require a dedicated period of cold dormancy to develop robust root systems. Without this essential chilling phase, the bulbs will fail to produce their signature fragrant, dense flower spikes in the spring.
The ideal window for planting hyacinth bulbs is mid-to-late autumn. Specifically, you should aim to get them into the ground four to six weeks before the soil freezes. This timing allows the bulb to settle and establish roots while the soil is still cool, but before the harsh, deep winter frost sets in.
To determine the perfect moment for your specific location, consider these practical guidelines:
- Monitor soil temperature: Aim to plant when the soil temperature consistently drops below 60°F (15°C). This usually occurs after the first few frosts of the season.
- Check your hardiness zone: Gardeners in colder climates (Zones 3–5) should plant earlier in the autumn, typically September or early October. Those in milder climates (Zones 6–9) can wait until late October or even November.
- Follow the local frost date: If you know your area’s average first hard frost date, count backward by six weeks. This is your target planting window.
If you live in a climate with very mild winters where the ground never freezes, hyacinth bulbs may not receive the necessary cold exposure to bloom. In these regions, you must “pre-chill” your bulbs in a refrigerator for 8 to 10 weeks before planting them in late winter or early spring. Avoid placing them near fruits like apples, which release ethylene gas that can damage the developing flower buds.
By respecting these seasonal requirements, you ensure the bulbs have the energy reserves needed to push through the soil as soon as the spring thaw begins. Planting too early can lead to premature growth that gets damaged by frost, while planting too late prevents the root system from forming, resulting in weak, stunted blooms.
Selecting and Preparing Your Planting Site
Selecting the right location is the most critical step in ensuring your hyacinths return year after year. These bulbs thrive in areas that receive full sun to partial shade. Aim for a spot that gets at least six hours of direct sunlight daily; this energy is essential for the bulb to store enough fuel for the following season’s blooms.
Equally important is soil drainage. Hyacinths are highly susceptible to bulb rot if left in standing water. If your garden has heavy clay soil, you must improve its structure before planting. Avoid low-lying areas of the yard where water pools after a heavy rain.
Once you have identified a suitable site, prepare the ground thoroughly to give your bulbs the best start:
- Clear the area: Remove all existing weeds, grass, and debris. Weeds compete for nutrients and moisture, which can weaken your bulbs.
- Amend the soil: Incorporate a generous layer of organic compost or well-rotted manure into the top 8 to 10 inches of soil. This improves drainage in heavy soils and adds vital nutrients to sandy soils.
- Test for drainage: If you are concerned about water retention, dig a hole and fill it with water. If it takes more than a few hours to drain completely, consider planting your bulbs in raised beds or adding grit to the soil mixture.
Taking the time to cultivate a loose, nutrient-rich environment allows the root systems to establish quickly before the ground freezes. Avoid using fresh, uncomposted manure, as this can burn the bulbs or encourage fungal growth. By creating a well-draining, weed-free zone now, you provide the stability necessary for robust bulb development and vibrant spring flowers. If your site is naturally rocky, remove large stones to ensure the bulbs can grow straight and unobstructed. A little extra effort in site preparation drastically reduces the risk of disease and ensures your hyacinths have the resources they need to thrive throughout their dormant winter period.

Step-by-Step Planting Guide
Proper planting is the foundation for a vibrant spring display. Before you begin, choose a location with well-draining soil, as hyacinth bulbs will rot if left in standing water. Once you have prepared your garden bed, follow these steps to ensure your bulbs establish a strong root system before the ground freezes.
Step-by-Step Planting Process:
- Digging: Use a trowel or bulb planter to create a hole between 6 and 8 inches deep. This depth protects the bulb from temperature fluctuations and prevents it from heaving out of the soil during winter thaws.
- Placement: Position the bulb with the pointed end facing upward. The roots will emerge from the flat base, and the foliage will push through the pointed tip.
- Spacing: Space each bulb 4 to 6 inches apart. Proper spacing is essential for airflow, which helps prevent fungal diseases and ensures each plant has enough nutrients to bloom fully.
- Covering: Fill the hole with soil, covering the bulb completely. Use your hands to firm the soil gently; this removes large air pockets that could dry out the roots or allow frost to penetrate too deeply.
- Watering: Water the area thoroughly immediately after planting. This settles the soil around the bulb and signals the plant to begin its initial root development.
If you are planting in an area prone to heavy rainfall or clay-heavy soil, consider adding a small handful of grit or sand to the bottom of each hole to improve drainage. Avoid using high-nitrogen fertilizers at the time of planting, as this can encourage premature foliage growth that may be damaged by the first frost. Instead, focus on creating a stable, moist environment that allows the bulb to remain dormant and healthy throughout the winter months. By following these precise steps, you provide your hyacinths with the best possible start for a fragrant, colorful arrival in the spring.
Safety and Tool Handling
Gardening is a rewarding activity, but it requires prioritizing safety to ensure a smooth planting experience. Before you begin digging, equip yourself with a pair of durable, well-fitting gardening gloves. These are essential for preventing painful blisters caused by repetitive tool use and shielding your skin from soil-borne irritants, bacteria, or accidental scrapes against sharp rocks.
When selecting your equipment, ensure your trowels and bulb planters are in good working order. Sharp tools make planting significantly easier, but they also require extra caution. Always cut away from your body, keep your fingers clear of the tool’s path, and store sharp implements securely when they are not in use. Additionally, keep your tools clean by wiping them down after every session to prevent the transmission of soil-borne plant diseases between your garden beds.
Specific care is required when handling hyacinth bulbs. These bulbs contain calcium oxalate crystals, which are natural defense mechanisms that can cause significant skin irritation, redness, or itching upon contact. To protect yourself, follow these safety protocols:
- Wear gloves: Never handle hyacinth bulbs with bare hands. Thick, moisture-resistant gloves provide a necessary barrier against the irritating crystals.
- Avoid touching your face: While working, resist the urge to touch your eyes, nose, or mouth. The crystals can easily transfer from your gloves to sensitive mucous membranes.
- Wash thoroughly: Once your planting is complete, remove your gloves carefully and wash your hands and forearms with warm, soapy water. This removes any residual sap or microscopic crystals that may have bypassed your gloves.
- Keep pets away: Store bulbs in a secure location out of reach of children and pets, as these crystals are also toxic if ingested.
By taking these simple precautions, you can enjoy the process of preparing your garden for spring blooms while keeping your hands healthy and pain-free. Proper preparation is the foundation of a successful and injury-free gardening season.
Follow-up Care and Common Questions
Once your hyacinth bulbs are in the ground, proper maintenance ensures a strong display the following season. Immediately after planting, apply a two-to-three-inch layer of organic mulch, such as shredded bark or pine needles, over the area. This protective barrier acts as insulation, regulating soil temperature during winter fluctuations and helping the soil retain essential moisture.
As spring arrives and your hyacinths finish blooming, resist the urge to trim the foliage immediately. The leaves are the plant’s solar panels, actively collecting sunlight to recharge the bulb for next year’s growth. Follow these steps to ensure long-term health:
- Allow the foliage to remain undisturbed until it turns completely yellow or brown.
- Once the leaves have withered naturally, you may gently pull them away or snip them off at the soil line.
- Avoid braiding or tying the leaves, as this limits the plant’s ability to photosynthesize effectively.
If you notice stunted growth, yellowing leaves before the bloom cycle ends, or signs of pest damage, assess your site conditions first. Hyacinths require well-draining soil; if the area remains waterlogged, bulbs may rot. Conversely, if the soil is too dry, growth will be sparse. Ensure the bulbs are receiving adequate sunlight, as shaded areas often lead to weak, leggy stems.
If problems persist despite proper care, do not rely on generic online advice. Local conditions, such as specific soil pH levels or regional pest populations, play a significant role in plant health. In these instances, contact your local university cooperative extension office or consult a professional horticulturist. These experts can provide site-specific diagnostics and chemical-free solutions tailored to your unique garden environment. By observing your plants closely and allowing the foliage to die back naturally, you set the stage for vibrant, fragrant blooms year after year.

Dedicated team of gardening enthusiasts with years of hands-on experience testing lawn mowers, gardening tools, and outdoor equipment. We help home gardeners and professionals alike make informed buying decisions with honest, thorough reviews. From push mowers to pruning shears, we test it all so you don’t have to. Got a gardening tool you’d like us to review? Get in touch!