
Fritillaria bulbs should be planted in the autumn, ideally between September and October, before the ground freezes. This timing allows the bulbs to establish a strong root system during the cool dormant months, ensuring they bloom reliably in the spring. Proper timing is the secret to achieving those iconic, bell-shaped flowers.
While these architectural perennials are stunning, they can be somewhat temperamental compared to standard tulips or daffodils. They require specific soil conditions, particularly excellent drainage, to prevent rot during the damp winter season. Understanding their unique needs before you dig will save you significant frustration and help your garden thrive long-term.
In this guide, we will walk you through the entire process, from selecting the healthiest bulbs to finding the perfect spot in your garden. We cover soil preparation, planting depth, and essential maintenance tips to keep your fritillaria returning year after year. Let’s get your garden ready for a spectacular spring display.
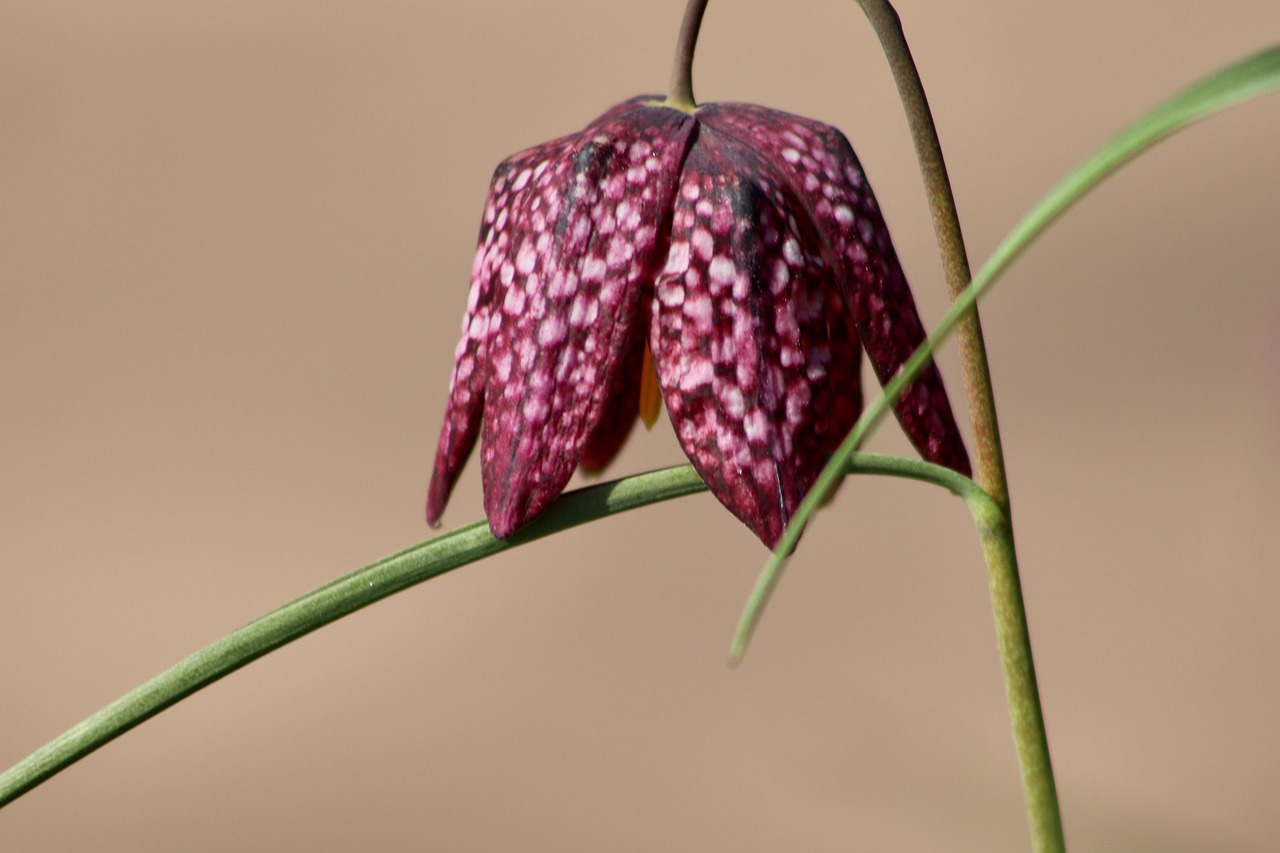
The Ideal Time to Plant Fritillaria Bulbs
To ensure your Fritillaria bulbs establish a robust root system before winter, timing is everything. The ideal window for planting is early to mid-autumn, typically between September and October. During this period, soil temperatures begin to drop, which is essential for triggering root development without encouraging premature foliage growth.
Planting at the right moment is a balancing act. If you plant too early while the ground is still warm, the bulbs are susceptible to rotting before they can settle. Conversely, waiting until the ground begins to freeze prevents the roots from anchoring properly, often resulting in weak, stunted plants or failure to bloom the following spring.
Follow these practical guidelines to determine the best day for planting in your garden:
- Monitor soil temperature: Aim to plant when the soil has cooled to approximately 60°F (15°C) or lower.
- Check your first frost date: Try to get your bulbs into the ground at least four to six weeks before the first hard frost is expected in your region.
- Assess soil moisture: Ensure the ground is workable and not waterlogged. If your garden soil is heavy or prone to standing water, amend it with grit or compost to improve drainage before planting.
If you live in a region with particularly mild autumns, err on the side of planting later in October. If you reside in a colder climate where the ground freezes early, prioritize planting in September. Once the bulbs are in the ground at the correct depth—usually three times the height of the bulb—apply a layer of mulch. This helps maintain a consistent soil temperature, protecting the bulbs from the fluctuating freeze-thaw cycles of late autumn. By respecting these seasonal cues, you provide your Fritillaria with the stability they need to thrive and produce their signature, dramatic blooms once spring arrives.
Selecting and Preparing the Planting Site
Selecting the right location is the most critical step in ensuring your fritillaria bulbs thrive. These unique, bell-shaped flowers are sensitive to moisture levels; they require soil that drains exceptionally well. If planted in heavy clay or areas where water pools after rain, the bulbs are highly prone to rotting before they ever have a chance to sprout.
Most fritillaria varieties perform best in a site that receives full sun to partial shade. While they enjoy the warmth of the sun, they also appreciate the protection of dappled light, especially in regions with intense afternoon heat. Observe your garden throughout the day to identify a spot that offers this balance.
Before you begin digging, prepare the planting site thoroughly to give your bulbs the best start. Follow these steps to create an ideal growing environment:
- Clear the area: Remove all weeds, grass, and debris from the planting bed. Weeds compete for nutrients and can harbor pests that threaten your bulbs.
- Amend the soil: Improve drainage and soil structure by mixing in generous amounts of organic matter, such as well-rotted compost, leaf mold, or aged manure. This not only aids in water management but also provides essential nutrients for long-term health.
- Check for compaction: If your soil is dense or compacted, work the organic matter in to a depth of at least 8 to 10 inches. This ensures that the bulbs have loose, aerated soil to grow their roots into.
If you are gardening in an area with particularly heavy soil, consider planting your fritillaria in raised beds or on a slight slope. This natural elevation helps excess water move away from the bulb zone. Taking these simple precautions during the site selection phase significantly reduces the risk of bulb failure and sets the stage for a vibrant, healthy display when the growing season arrives.

How to Plant Fritillaria Bulbs Correctly
Proper planting is the foundation for healthy, long-lasting Fritillaria. Because these bulbs are sensitive to moisture, correct placement in the soil is critical to prevent rot and ensure vigorous spring growth.
Start by preparing a well-draining garden bed. Dig a hole approximately three times the depth of the bulb. For example, if your bulb is two inches tall, it should be buried under six inches of soil. This depth protects the bulb from temperature fluctuations and provides the stability needed for tall flower stalks.
When placing the bulb in the hole, follow these professional guidelines:
- Orientation: Always place the bulb with the pointed end facing upward. This ensures the shoot finds the most direct path to the surface.
- The Imperialis Exception: For large varieties like Fritillaria imperialis, position the bulb slightly on its side. These bulbs feature a hollow crown that can collect rainwater, leading to decay. Tilting the bulb allows excess water to run off rather than pooling in the center.
- Spacing: Proper airflow is essential to prevent fungal issues. Space your bulbs 6 to 12 inches apart, depending on the specific variety size. Refer to your bulb packaging for the exact requirements of your chosen species.
Once positioned, cover the bulbs gently with soil and press down firmly to eliminate large air pockets. Water the area lightly to settle the soil. Avoid overwatering immediately after planting, as the bulbs prefer to establish their root systems in moderately moist, not waterlogged, conditions.
If you are planting in heavy clay soil, consider adding a handful of horticultural grit or sand to the bottom of each hole. This simple step improves drainage around the base of the bulb, significantly reducing the risk of rot during the dormant winter months. By taking these small, deliberate steps during the planting phase, you create the ideal environment for your Fritillaria to thrive and return year after year.
Safety and Tool Handling Tips
Planting Fritillaria bulbs requires precision and care, both for the health of your garden and your personal safety. Because these bulbs are often planted in late summer or autumn when the soil begins to harden, using the right equipment is essential to prevent strain.
Always utilize a sturdy garden trowel or a dedicated bulb planter to create consistent, uniform holes. Avoid using your bare hands to force bulbs into compacted earth, as this can lead to uncomfortable blisters or repetitive strain injuries.
Furthermore, protection is vital when handling botanical materials. We recommend wearing heavy-duty gardening gloves throughout the process. Some Fritillaria varieties contain compounds that may cause mild skin irritation or dermatitis upon contact. Gloves act as a necessary barrier, keeping your hands clean and protected from both bulb sap and sharp debris in the soil.
If you are planting a large collection of bulbs and decide to use a mechanical auger, prioritize these safety protocols:
- Eye Protection: Always wear impact-resistant safety goggles. Augers can easily kick up rocks, mulch, or dry soil particles that pose a risk to your eyes.
- Foot Placement: Keep your feet well clear of the tool’s path. Never position your feet near the auger bit while the motor is engaged.
- Equipment Control: Maintain a firm, two-handed grip on the tool to ensure stability if the auger hits a buried root or hard obstruction.
- Clear the Area: Ensure children and pets are kept at a safe distance from the planting site while power tools are in use.
By preparing your workspace and using your tools deliberately, you ensure that the planting process remains efficient and injury-free. Taking these small precautions allows you to focus entirely on the rewarding task of establishing your garden for the following spring. Remember, a successful gardening season begins with a safe and methodical planting day.

Post-Planting Care and Common Questions
Once your bulbs are in the ground, give the area a thorough watering. This helps settle the soil around the bulb, eliminating large air pockets and ensuring good contact with the earth. Avoid over-saturating the site; the soil should be moist but never swampy, as excess moisture can quickly lead to bulb rot.
Applying a two-to-three-inch layer of organic mulch, such as shredded bark or pine needles, is highly recommended. This protective blanket regulates soil temperature, keeping the ground cool during unexpected warm spells in autumn and preventing the soil from heaving during deep winter freezes. It also helps suppress weeds that might compete with your fritillaria for nutrients.
If you notice stunted growth or a failure to bloom in the spring, investigate your site conditions immediately. Fritillaria bulbs are sensitive to drainage issues. If the area remains waterlogged after heavy rain, the bulbs may be struggling to breathe. Ensure your planting site has excellent drainage, perhaps by amending heavy clay soil with organic compost or grit before the next season.
Pests can occasionally disrupt your gardening success. The scarlet lily beetle is a common concern for many fritillaria enthusiasts. If you spot these bright red insects or their larvae on your foliage, take action early to prevent defoliation. For effective, region-specific management strategies, consider these steps:
- Inspect the undersides of leaves regularly during the growing season for eggs.
- Hand-pick adult beetles and drop them into a container of soapy water.
- Contact your local agricultural extension office or a trusted garden center for advice on safe, local-approved pest control measures.
By monitoring moisture levels and staying vigilant against pests, you provide your fritillaria with the best environment to establish strong roots. With proper care, these unique bulbs will reward you with reliable, striking blooms year after year. Always remember that healthy soil is the foundation of a thriving bulb garden.

Dedicated team of gardening enthusiasts with years of hands-on experience testing lawn mowers, gardening tools, and outdoor equipment. We help home gardeners and professionals alike make informed buying decisions with honest, thorough reviews. From push mowers to pruning shears, we test it all so you don’t have to. Got a gardening tool you’d like us to review? Get in touch!