
Fritillaria bulbs should be planted in the autumn, ideally between September and October, before the first hard frost sets in. This timing allows the roots to establish themselves in the cooling soil, which is essential for healthy spring growth. These striking, architectural bulbs add immense drama to any garden landscape.
To ensure these unique perennials thrive and bloom, you must provide them with the right environment and care. While they are beautiful, they can be somewhat temperamental compared to standard tulips or daffodils. Understanding their specific drainage needs and soil preferences is the key to achieving consistent, vibrant results year after year.
This comprehensive guide explains exactly when to get your bulbs in the ground and how to prepare them for long-term success. We will cover everything from selecting the perfect site to proper planting depth and post-planting maintenance. Follow these practical steps to master the art of growing these spectacular flowers in your own backyard.

The Ideal Planting Window for Fritillaria
To ensure your Fritillaria bulbs thrive, timing is everything. These unique, architectural plants require a specific period of cold dormancy to develop a robust root system before the ground freezes solid. For the best results, aim to get your bulbs in the ground during the autumn, specifically between September and October.
Planting within this window allows the bulbs to settle into the soil while it is still workable. If you plant too early, the bulbs may sprout prematurely, leaving them vulnerable to frost damage. If you wait until the ground has already hardened, the roots will struggle to establish, often resulting in weak growth or a failure to bloom come spring.
Follow these practical guidelines for a successful autumn planting:
- Check your soil temperature: Aim to plant when soil temperatures have cooled significantly but before the first hard frost.
- Prioritize drainage: Fritillaria bulbs are prone to rot. Ensure your planting site has excellent drainage; if you have heavy clay soil, mix in grit or horticultural sand at the bottom of the planting hole.
- Mind the depth: As a general rule, plant these bulbs at a depth of three times their height. Large varieties, like Fritillaria imperialis, should be planted on their sides to prevent water from pooling in the concave tops of the bulbs, which can cause them to decay.
- Mark your spot: Since these bulbs remain dormant underground for months, place a small garden marker near the planting site so you do not accidentally disturb them while performing late-winter or early-spring garden cleanup.
By respecting this autumn planting window, you provide your Fritillaria with the necessary time to anchor themselves. Once the soil begins to warm in early spring, your bulbs will be primed and ready to push up healthy foliage, rewarding your patience with their distinct, dramatic blooms.
Preparing Your Garden Site
Before you commit to a planting date for your Fritillaria bulbs, you must ensure your garden site is properly prepared. These bulbs are notoriously sensitive to moisture levels; if left in standing water or heavy, compacted soil, they will quickly succumb to rot. Selecting a location with excellent drainage is the single most important step for long-term success.
Most Fritillaria varieties thrive in a spot that receives full sun to partial shade. If you are planting in a region with particularly hot summers, prioritize a location that offers afternoon shade to protect the bulbs during their dormant period. Avoid low-lying areas of the yard where rainwater tends to pool after a storm.
Once you have selected the ideal spot, follow these steps to prepare the soil:
- Clear the area: Remove all weeds, grass, and surface debris. Weeds compete for nutrients and can harbor pests that may damage your bulbs.
- Amend the soil: If your soil is heavy clay, mix in organic matter like compost or well-rotted leaf mold to improve drainage and aeration.
- Loosen the earth: Use a garden fork to loosen the soil to a depth of at least 10 to 12 inches, creating a soft bed for the roots to penetrate.
Safety should always be your priority when working the ground. When using sharp hand trowels or long-handled shovels to dig your planting holes, always wear sturdy, well-fitting gardening gloves. These provide a necessary barrier against blisters caused by repetitive motion and protect your skin from potential soil-borne irritants, sharp stones, or hidden debris.
Finally, check the soil moisture before you begin. The ground should be workable and crumbly, not muddy or frozen. If you can squeeze a handful of soil and it remains in a tight, wet clump, wait for a few dry days before digging. Taking the time to create a hospitable environment now ensures your Fritillaria will establish a strong root system before the winter dormancy sets in.
Proper Planting Depth and Spacing
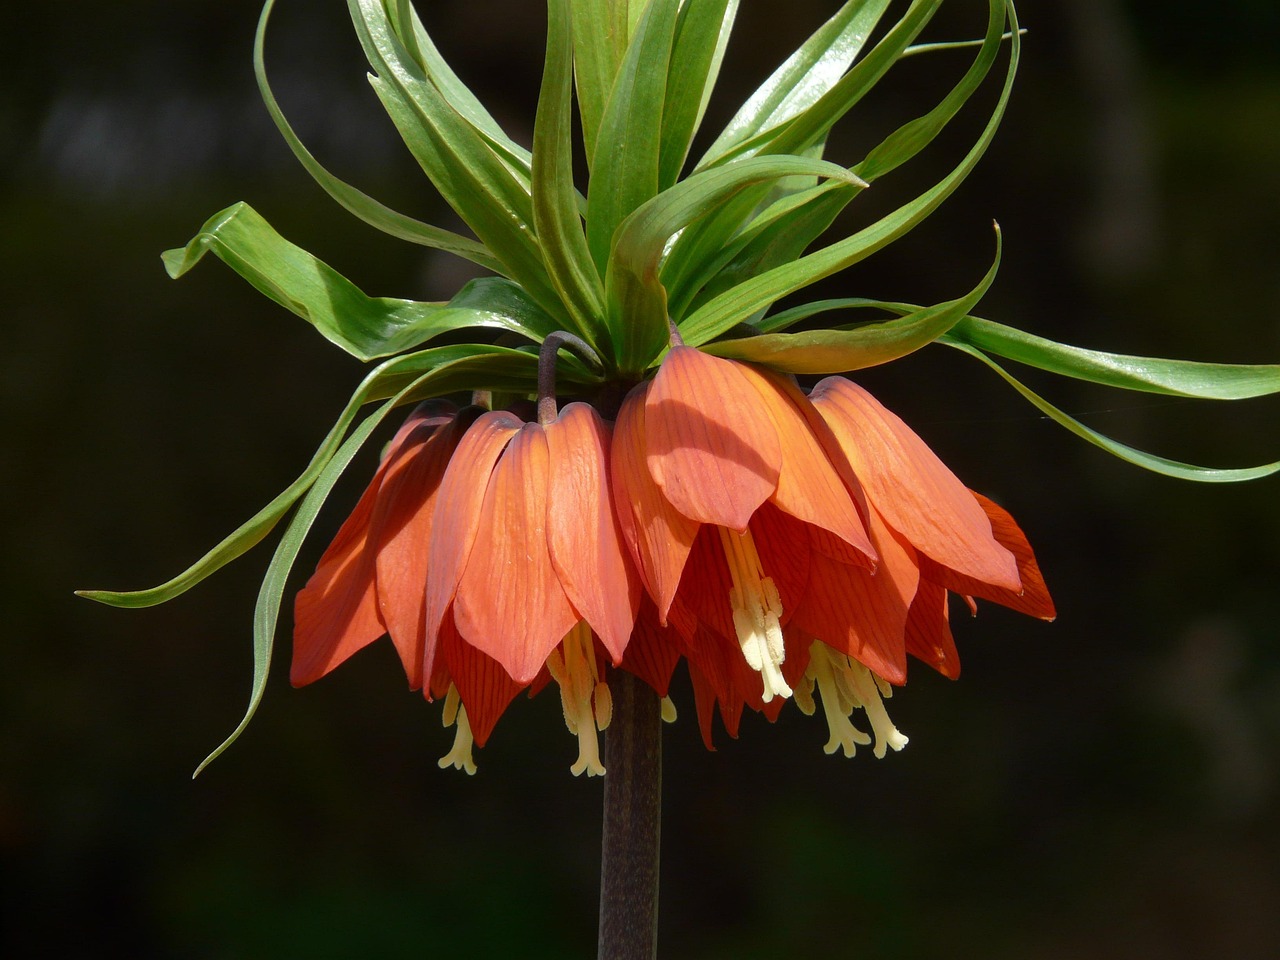
Unlike smaller spring-flowering bulbs, Fritillaria bulbs are substantial and require specific attention to planting depth to thrive. As a general rule of thumb, plant your bulbs at a depth equivalent to three times the height of the bulb itself. For larger varieties like Fritillaria imperialis (Crown Imperial), this can mean burying them 6 to 8 inches deep, while smaller species may only require 3 to 4 inches of soil coverage.
Proper spacing is equally vital to ensure adequate airflow and nutrient access. Crowding can lead to moisture retention issues, which may cause the bulbs to rot. Follow these guidelines for spacing based on the size of your chosen variety:
- Large varieties (e.g., Crown Imperials): Space bulbs 10 to 12 inches apart to accommodate their significant size and foliage spread.
- Medium to small varieties (e.g., Fritillaria meleagris): Space bulbs 6 to 8 inches apart to allow for naturalizing over time.
When preparing to plant, handle the bulbs with extreme care. Many Fritillaria species possess fragile, fleshy scales that are prone to bruising or snapping. Unlike tougher bulbs, these scales do not have a protective outer tunic, making them highly susceptible to damage during handling. If a scale breaks off, the bulb becomes vulnerable to fungal infections and rot once placed in the soil.
To protect the bulb during the planting process, dig a hole slightly wider than necessary and gently place the bulb inside, ensuring it is sitting upright. If you are planting the larger, hollow-centered Crown Imperial bulbs, tilt them slightly on their side. This prevents water from pooling in the center of the bulb, which is a common cause of decay. Once positioned, backfill the hole gently with loose, well-draining soil and press down lightly to remove large air pockets without compacting the earth too firmly. Proper depth and careful handling are the best insurance for a successful, long-lived display in your garden.
Safety and Handling Precautions
Before you begin planting your Fritillaria bulbs, prioritize your personal safety. While these striking perennials are a beautiful addition to any garden, the bulbs themselves contain compounds that can cause skin irritation or contact dermatitis in sensitive individuals. To avoid discomfort, always wear sturdy gardening gloves when handling the bulbs.
If you have sensitive skin, consider wearing long sleeves to prevent accidental contact with your forearms. Should you inadvertently touch a bulb with your bare skin, wash the area thoroughly with soap and water immediately to remove any residual sap or dust.
For larger planting projects, you may be tempted to use power equipment. If you choose to use a power auger to dig your holes, follow these essential safety practices:
- Wear eye protection: Always use safety goggles. Power augers can kick up soil, rocks, and debris at high speeds, which can cause serious eye injuries.
- Verify utility lines: Before breaking ground, ensure you know the location of all underground utility lines. Contact your local utility locating service to mark gas, water, and electrical lines to prevent dangerous and costly accidents.
- Maintain firm footing: Power equipment can be unpredictable in soft or uneven soil. Keep a wide, stable stance and ensure your workspace is clear of tripping hazards.
By taking these simple precautions, you can enjoy the process of naturalizing your garden without the risk of skin irritation or injury. Proper preparation not only protects you but also ensures that your planting session remains efficient and enjoyable. Once your bulbs are safely in the ground, remember to wash your gardening tools and thoroughly clean your hands before touching your face or eating. Taking these small steps allows you to focus entirely on the rewarding experience of cultivating your garden and anticipating the unique, bell-shaped blooms that Fritillaria will provide in the coming season.

Aftercare and Common Questions
Once you have finished planting your fritillaria bulbs, give the area a thorough watering. This helps settle the soil around the bulb, eliminating large air pockets and ensuring good contact with the earth. Avoid over-saturating the ground, as bulbs prefer well-draining soil to prevent rot.
As spring arrives and the foliage emerges, patience is your best tool. Resist the urge to tidy up the garden by cutting back the leaves once the flowers fade. The foliage is essential for photosynthesis, allowing the plant to store the energy required for next year’s growth. Wait until the leaves have turned yellow and withered completely before removing them.
If your fritillaria bulbs fail to bloom, consider these common troubleshooting steps:
- Sunlight requirements: Ensure your plants are receiving adequate light. Most fritillaria varieties thrive in full sun to partial shade; too much shade can inhibit flower production.
- Summer moisture levels: While bulbs need water during the growing season, they prefer drier conditions during their summer dormant phase. Ensure your soil drainage is sufficient to prevent the bulbs from sitting in stagnant moisture, which can lead to rot.
- Bulb maturity: Some larger varieties may take a season to establish themselves before producing a reliable display of blooms.
If you encounter persistent issues with pests, such as the lily beetle, or notice signs of bulb rot, reach out to your local horticultural extension office. They can provide variety-specific advice tailored to your local climate and soil conditions. Maintaining healthy soil structure and providing proper spacing during the initial planting phase are the best defenses against these common challenges.
By allowing the bulbs to complete their natural life cycle and monitoring soil moisture during dormancy, you will encourage a stronger, more vibrant display in the following spring. Keep the area free of heavy mulch that might trap excess moisture, and your fritillaria will remain a staple of your garden for years to come.

Dedicated team of gardening enthusiasts with years of hands-on experience testing lawn mowers, gardening tools, and outdoor equipment. We help home gardeners and professionals alike make informed buying decisions with honest, thorough reviews. From push mowers to pruning shears, we test it all so you don’t have to. Got a gardening tool you’d like us to review? Get in touch!