
Learning how to care for hydrangeas in spring is the most effective way to ensure your shrubs thrive and produce stunning flowers. This critical maintenance period sets the stage for healthy growth, allowing you to prepare your garden for a season of prolific, vibrant blooms that will last all summer long.
While hydrangeas are relatively resilient, they require specific attention as temperatures rise to reach their full potential. Understanding the unique needs of your specific variety is essential, as incorrect timing or over-fertilizing can accidentally sacrifice your upcoming flower buds. Realistic expectations and consistent care are the true keys to success.
This guide covers all the essential steps to properly prep your shrubs for the warmer months ahead. We will walk you through expert techniques for pruning, feeding, and soil management. By following these practical instructions, you will avoid common mistakes that often cost gardeners their summer blooms and keep your plants healthy.
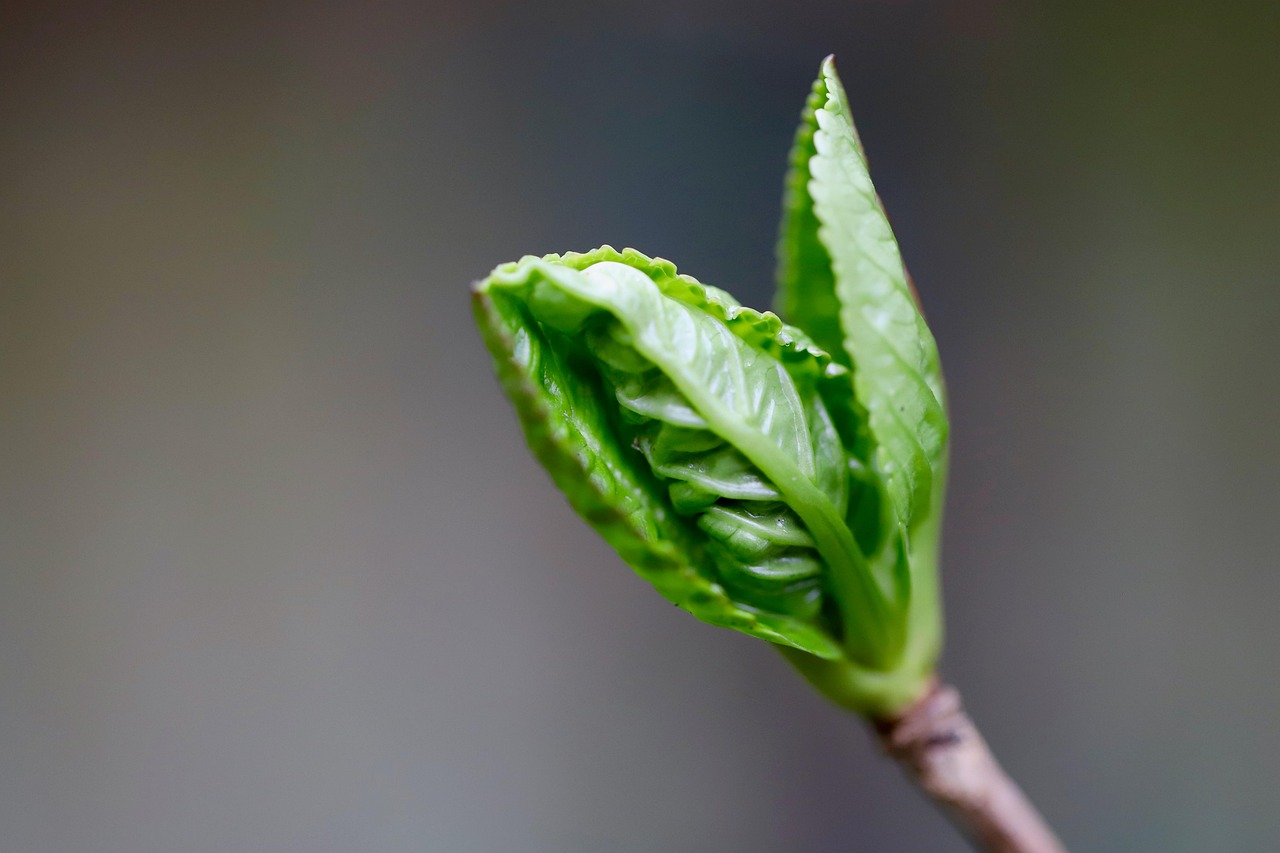
Assess Your Hydrangea Type Before Pruning
Before you make your first cut, you must identify your hydrangea variety. Pruning at the wrong time can accidentally remove the flower buds you have been waiting all winter to see. Hydrangeas generally fall into two categories regarding their bloom cycle:
- Old Wood: Varieties like Bigleaf (Hydrangea macrophylla) and Oakleaf (H. quercifolia) set their flower buds on stems grown during the previous summer. If you prune these in spring, you will likely cut off this season’s blooms.
- New Wood: Varieties like Panicle (H. paniculata) and Smooth (H. arborescens) produce flowers on the current season’s growth. These are much more forgiving and can be pruned in early spring without sacrificing flowers.
If you are unsure which type you have, wait until the plant begins to leaf out. This makes it easy to distinguish between living tissue and dead stems. Regardless of the variety, you can safely perform “sanitary pruning” at any time in the spring.
To identify stems that need removal, perform the “scratch test.” Use your fingernail to gently scrape a small patch of bark on a stem. If the tissue underneath is green and moist, the stem is alive. If it is brown, brittle, or dry, the stem is dead and should be removed. You may also prune away any branches that are crossing, rubbing against each other, or showing signs of winter damage.
When performing these cuts, always use sharp, sanitized bypass pruners. Bypass pruners act like scissors, providing a clean, precise cut that minimizes tissue crushing. Anvil-style pruners can pinch and damage the stems, creating entry points for diseases. To sanitize your tools, wipe the blades with rubbing alcohol or a 10% bleach solution between plants. This simple step prevents the spread of pathogens, ensuring your hydrangeas remain healthy and vibrant as they enter the growing season.
Spring Cleanup and Soil Preparation
As temperatures begin to rise, your hydrangeas will start to wake from their winter dormancy. The first step in spring care is a thorough cleanup to set the stage for healthy growth. Carefully remove any old, matted mulch, fallen leaves, and dead plant debris from around the base of the shrub. This material often harbors overwintering fungal spores and pests that can hinder your plant’s progress once the growing season begins.
Clearing this debris is essential for improving airflow around the crown of the plant. Proper circulation is your best defense against common hydrangea issues like powdery mildew and leaf spot. Once the area is clear, gently rake the soil surface to break up any compaction caused by winter snow and rain, taking care not to damage shallow roots.
After cleaning, provide your hydrangeas with the nutrients they need to support new foliage and blooms. Follow these steps to prepare the soil:
- Apply a two-inch layer of high-quality organic compost over the root zone. This slowly releases nutrients and improves soil structure.
- If you prefer to add a fresh layer of mulch to retain moisture, use pine bark or wood chips.
- Always maintain a “buffer zone” of two to three inches between the mulch and the actual stems of the plant.
This gap is critical for the long-term health of your hydrangeas. Piling mulch directly against the woody stems creates a damp, dark environment that encourages bark rot and invites opportunistic insects. By keeping the base of the plant clear and dry, you ensure that moisture is directed toward the root system where it is needed most, rather than trapping humidity against the sensitive crown.
Finally, check the soil moisture levels. If spring rains have been scarce, give your hydrangeas a deep, thorough watering to help them transition into active growth. A well-prepared, clean, and nourished base will reward you with stronger stems and more vibrant flowers throughout the summer months.

Fertilizing for Optimal Growth
Spring is the most critical time to nourish your hydrangeas as they wake from dormancy. Once you notice buds beginning to swell, it is the ideal time to apply a balanced, slow-release fertilizer. A 10-10-10 NPK formula is generally effective for supporting overall plant health and foliage development.
Avoid the temptation to over-fertilize. Applying too much nitrogen can lead to lush, leafy growth at the expense of flowers. If you feed your plants too heavily, the hydrangea may prioritize vegetative growth over bloom production, leaving you with a green shrub devoid of color.
For Bigleaf hydrangeas (Hydrangea macrophylla), soil pH directly dictates flower color. Understanding this relationship allows you to influence your garden’s aesthetic:
- Blue blooms: Thrive in acidic soil (pH below 6.0). You can lower your soil pH by adding aluminum sulfate or elemental sulfur.
- Pink blooms: Thrive in alkaline soil (pH above 7.0). You can raise your soil pH by adding garden lime.
- Purple or transitional shades: Occur in neutral soil conditions (pH between 6.0 and 7.0).
When adjusting pH, always test your soil first using a simple home kit. Changes to soil chemistry do not happen overnight; it often takes an entire growing season for the plant to absorb the minerals and reflect the change in its petals. Apply soil amendments carefully according to package instructions, as drastic shifts can stress the root system.
To ensure success, always water your hydrangeas thoroughly before and after fertilizing. This helps distribute the nutrients evenly into the root zone and prevents the chemicals from burning delicate feeder roots. By providing a steady, moderate supply of nutrients early in the season, you set the stage for a vibrant, long-lasting display of blooms throughout the summer months.
Safety Precautions for Garden Maintenance
Spring maintenance often involves heavy pruning and clearing debris. Before you begin working on your hydrangeas, prioritize your physical safety. Gardening can be physically demanding, and small oversights often lead to preventable injuries.
The most important step is choosing the right personal protective equipment. Hydrangeas may not have thorns, but they often grow alongside roses or dense shrubs that do. Always wear thick, puncture-resistant gardening gloves. These protect your hands from sharp stems, hidden insects, and abrasive bark.
Additionally, consider these essential safety practices:
- Wear safety glasses: When pruning woody stems, small wood chips or dried debris can easily flick into your eyes. Protective eyewear is a simple, effective barrier against irritation and injury.
- Maintain sharp tools: Never use dull shears. A dull blade requires excessive force to cut through a stem, which increases the risk of the tool slipping and cutting your hand. Sharp tools make clean, precise cuts that heal faster for the plant and require much less physical effort from you.
- Check for stability: If you are working on uneven ground or reaching for higher branches, ensure your footing is stable. Avoid overextending your reach, as this strains your back and compromises your balance.
- Sanitize between plants: Keep a spray bottle of rubbing alcohol nearby. Wiping your blades between bushes prevents the accidental spread of fungal diseases or viruses from one hydrangea to the next.
Finally, be mindful of your body mechanics. If you are pruning large, established shrubs, take frequent breaks to stretch your hands and shoulders. Repetitive motion can lead to fatigue, and tired gardeners are more likely to make mistakes. By keeping your tools sharp and your body protected, you ensure that spring gardening remains a rewarding hobby rather than a source of injury. Always store your tools securely in a shed or garage immediately after use to keep sharp edges away from children and pets.

Troubleshooting and Ongoing Spring Support
As temperatures climb, your hydrangeas shift from dormancy into active growth. Consistent moisture is the foundation of spring care. Hydrangeas prefer deep, weekly soakings rather than frequent, shallow sprinkles. Aim to provide at least one inch of water per week, adjusting if you experience heavy spring rains. Always water at the base of the plant to keep the foliage dry, which helps prevent fungal issues like powdery mildew.
Monitor your new growth closely for signs of distress. If you notice yellowing leaves, stunted growth, or spots, inspect the undersides of the foliage for aphids or spider mites. Early intervention with a gentle stream of water or insecticidal soap is often enough to manage minor infestations before they spread.
Late-spring frosts remain a significant risk for many hydrangea varieties. If a sudden cold snap is forecasted, protect your plants by covering them overnight with frost cloth, burlap, or an old bedsheet. Ensure the cover reaches the ground to trap the heat radiating from the soil, but remove it promptly in the morning once temperatures rise above freezing to prevent overheating.
If you encounter persistent problems, utilize these resources for expert help:
- Local Cooperative Extension Offices: These offices provide free, science-based advice tailored to your specific climate and soil conditions. They are the best resource for identifying local pests or soil-borne diseases.
- Master Gardener Programs: Many extensions offer diagnostic clinics where you can bring photos or samples of struggling leaves for a professional assessment.
- Soil Testing: If your hydrangeas fail to thrive despite proper watering, contact your extension office to request a soil test kit to check for nutrient deficiencies or incorrect pH levels.
By staying vigilant during these critical weeks, you set the stage for a robust, healthy bloom season. If a plant appears to be dying despite your best efforts, do not hesitate to contact a professional. Early diagnosis is often the difference between saving a shrub and losing it to disease.

Dedicated team of gardening enthusiasts with years of hands-on experience testing lawn mowers, gardening tools, and outdoor equipment. We help home gardeners and professionals alike make informed buying decisions with honest, thorough reviews. From push mowers to pruning shears, we test it all so you don’t have to. Got a gardening tool you’d like us to review? Get in touch!