
Bromeliads are stunning, exotic-looking houseplants that add a tropical flair to any indoor space. While they may appear intimidating, they are surprisingly easy to maintain once you understand their unique watering and lighting needs. By mimicking their natural environment, you can help these resilient plants thrive and maintain their vibrant, long-lasting color for months.
It is important to remember that bromeliads have a distinct life cycle, as the central bloom eventually fades after several months. However, these plants often produce small offsets, known as pups, which allow you to propagate new growth. Understanding these natural patterns helps you manage expectations and ensures you provide the right care throughout each phase.
This guide covers everything you need to know to keep your bromeliad healthy and vibrant. We will explore the best soil mixtures, optimal indirect light placements, and the specific technique of watering the central tank rather than the soil. Follow these practical steps to master the art of caring for your beautiful, low-maintenance tropical houseplant.

Understanding Bromeliad Lighting and Temperature
Finding the perfect spot for your bromeliad is the most critical step in ensuring its longevity. These tropical plants are accustomed to the filtered light of a forest canopy, making them sensitive to harsh, direct rays. Bright, indirect light is the gold standard for healthy growth and vibrant foliage.
If your bromeliad receives too little light, it may struggle to produce its signature colorful bloom. Conversely, placing it in intense, direct sun can quickly scorch the leaves, leaving unsightly brown patches. To strike the right balance, follow these placement guidelines:
- East-facing windows: These are often ideal, as they provide gentle morning sun that is rarely strong enough to burn the plant.
- West-facing windows: These work well, provided you use a sheer curtain to diffuse the afternoon intensity.
- Avoid South-facing windows: Unless shielded by a filter, the midday sun in these locations is usually too harsh for bromeliads.
Temperature management is equally important for keeping your plant stress-free. Bromeliads are comfortable in the same environment as humans, thriving in temperatures between 60 and 80 degrees Fahrenheit. Because they are tropical in origin, they do not tolerate extreme fluctuations well.
To protect your plant from environmental shock, keep it away from the following areas:
- Drafty entryways: Cold winter air can damage the plant’s cellular structure.
- Heating vents and radiators: These dry out the air and can dehydrate the plant rapidly.
- Air conditioning units: Constant cold air flow can stunt growth and cause the leaves to wilt.
By mimicking their native tropical environment, you encourage your bromeliad to remain healthy and vibrant year-round. If you notice the plant leaning heavily toward a window, it is a clear sign it needs more light; simply rotate the pot every few days to promote even, symmetrical growth. Consistent, stable conditions are the secret to a long-lasting, blooming bromeliad.
Proper Watering Techniques for Bromeliads
Unlike traditional houseplants that rely solely on their root systems for hydration, bromeliads are epiphytes. In their natural habitat, they perch on tree branches and gather moisture through a central structure known as a tank or urn. Replicating this unique watering method is the key to keeping your plant vibrant and healthy.
To water your bromeliad correctly, pour filtered or distilled water directly into the central cup formed by the base of the leaves. Avoid using hard tap water, as the high mineral content can cause unsightly spotting on the foliage and potentially damage the plant over time.
Because stagnant water can harbor bacteria or attract pests, you must maintain a consistent cleaning routine:
- Flush the tank: Every week, empty the central cup completely to remove debris and accumulated mineral salts.
- Refill with fresh water: Once cleaned, add fresh, filtered water back into the cup, filling it about halfway.
- Monitor the environment: If the air in your home is particularly dry, check the cup more frequently to ensure it hasn’t evaporated entirely.
While the central tank provides the bulk of the plant’s hydration, the soil still requires attention. The potting medium should be kept lightly moist, but never soggy. Bromeliads are highly susceptible to root rot, which occurs quickly if the roots are left in standing water or dense, waterlogged soil.
Use a well-draining potting mix specifically designed for bromeliads or orchids to ensure proper aeration. Before adding more water to the soil, touch the surface; if it feels damp, wait a few days. During the winter months, when growth slows down, you can allow the soil to dry out slightly more between waterings. By balancing the water level in the central cup with light soil moisture, you provide the ideal conditions for your bromeliad to thrive, bloom, and produce healthy offsets.
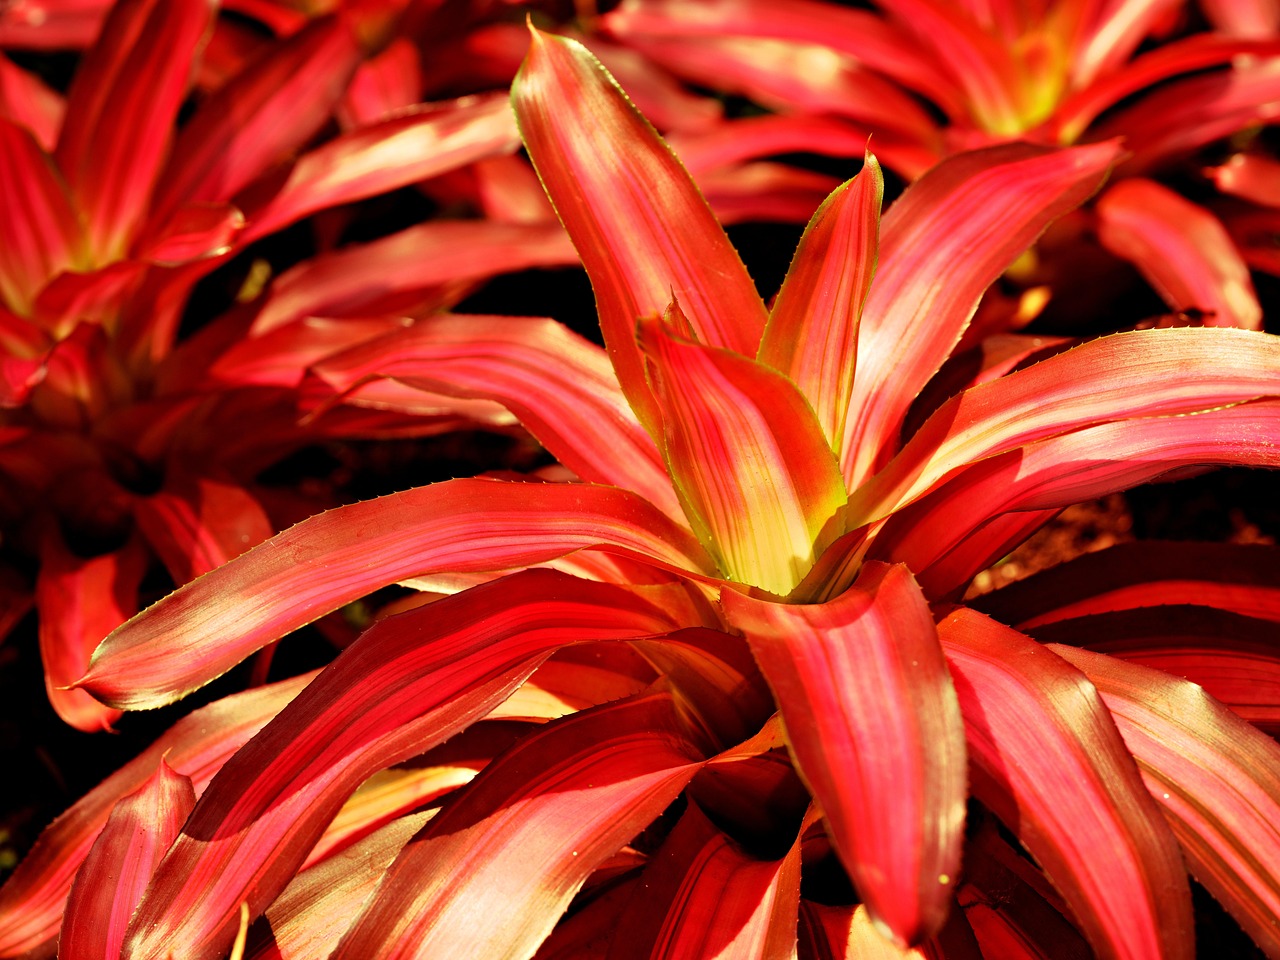
Soil and Humidity Requirements
Bromeliads are epiphytes in their natural habitat, meaning they often grow on trees rather than in deep soil. Consequently, their root systems are designed to anchor the plant rather than absorb vast amounts of nutrients from dense earth. To keep your bromeliad thriving, you must prioritize drainage above all else.
Avoid standard potting soil, which retains too much moisture and can lead to root rot. Instead, use a specialized, airy medium. Excellent options include:
- Orchid bark mixes: These provide the coarse texture necessary for proper aeration.
- Succulent or cactus potting blends: These contain perlite or sand, which help prevent water from sitting around the roots.
- A custom blend: Mix equal parts potting soil, peat moss, and perlite to achieve a light, fast-draining consistency.
Beyond the soil, humidity is the secret to a lush, healthy bromeliad. As tropical plants, they draw moisture directly from the air through their leaves. If your home environment is too dry—a common issue during winter months when heaters are running—the tips of the leaves may turn brown and crispy.
To replicate the humid conditions of a rainforest, consider these practical steps:
- Use a pebble tray: Fill a shallow tray with pebbles and add water until it reaches just below the top of the stones. Place your pot on top of the pebbles, ensuring the bottom of the pot does not touch the water directly. As the water evaporates, it creates a localized humid microclimate.
- Group plants together: Placing several houseplants near each other increases the humidity in the immediate area through transpiration.
- Run a humidifier: If you have a collection of tropical plants, a small room humidifier is the most effective way to maintain consistent moisture levels.
Avoid misting the leaves daily, as this often provides only temporary relief and can encourage fungal issues if the foliage stays wet for too long. Instead, focus on maintaining a stable, humid environment around the plant.
Safety Tips for Maintenance and Pruning
Maintaining your bromeliad requires a gentle touch and the right equipment. Because many bromeliad varieties feature stiff, serrated, or pointed leaf edges, physical protection is essential. Always wear a pair of durable gardening gloves before you begin grooming. This simple step prevents painful scratches and protects your skin from the sharp foliage common in many species.
When it comes to pruning, precision is key. Use high-quality, sharp pruning shears to ensure clean cuts. A dull blade can crush plant tissue rather than slicing through it, which creates an entry point for bacteria and slows recovery. Before you start, sanitize your shears with rubbing alcohol or a mild bleach solution to prevent the accidental spread of pathogens between your houseplants.
Follow these best practices to keep your maintenance routine safe and effective:
- Remove dead growth: Only trim leaves that have turned completely brown or withered. Use your shears to cut as close to the base of the leaf as possible without damaging the central rosette or the main stem.
- Stable positioning: If your bromeliad is displayed on a high shelf or hanging planter, never reach for it from an unstable surface. Always use a sturdy, reliable ladder placed on a flat, level floor to maintain your balance.
- Tool hygiene: Wipe your shears clean with a disinfectant cloth after every session. Storing dirty tools can harbor fungal spores that may infect your plant during the next pruning cycle.
- Work in good light: Ensure your workspace is well-lit so you can clearly distinguish between healthy green tissue and the dry, damaged sections you intend to remove.
By keeping your tools sharp and your workspace stable, you create a safe environment for both yourself and your plant. Regular, careful grooming not only improves the aesthetic appeal of your bromeliad but also encourages the plant to direct its energy toward new growth and healthy central blooms.
Common Questions and Long-Term Care
It is important to understand that a bromeliad’s vibrant bloom is a one-time event. Once the flower fades, the mother plant will slowly decline. While this may seem alarming, it is a natural part of the plant’s life cycle. During this phase, the parent plant focuses its remaining energy on producing “pups”—small offsets that emerge at the base.
To ensure the future of your plant, follow these steps for propagation:
- Wait until the pups reach approximately one-third the size of the parent plant.
- Use a clean, sharp knife to carefully sever the pup from the mother, ensuring you include a small portion of the root system if possible.
- Pot the pup in a small container using a well-draining, orchid-style potting mix.
- Keep the new plant in bright, indirect light and maintain consistent moisture until it establishes itself.
If you notice your bromeliad struggling, look for these common indicators:
Browning tips or yellowing leaves: These are often signs of environmental stress. Bromeliads are sensitive to mineral buildup in tap water; if your water is heavily treated or “hard,” try switching to filtered or rainwater. Additionally, browning tips often signal low humidity. Mist your plant regularly or place it on a tray filled with pebbles and water to increase the ambient moisture levels.
Persistent pests: If you spot small, fuzzy white spots (mealybugs) or hard, brown bumps (scale) on the foliage, act quickly to prevent an infestation. Isolate the plant from your other houseplants immediately. Because bromeliads have unique leaf structures that can trap chemicals, avoid harsh synthetic pesticides. Instead, consult your local nursery for targeted, organic treatments like neem oil or insecticidal soaps that are safe for indoor use.
With patience and proper care, you can successfully transition from your original bloom to a new generation of healthy, thriving bromeliads.

Dedicated team of gardening enthusiasts with years of hands-on experience testing lawn mowers, gardening tools, and outdoor equipment. We help home gardeners and professionals alike make informed buying decisions with honest, thorough reviews. From push mowers to pruning shears, we test it all so you don’t have to. Got a gardening tool you’d like us to review? Get in touch!