
Spider mites typically get on plants by hitchhiking on new nursery additions, traveling through open windows on the breeze, or clinging to your clothing after you have been working outdoors. These microscopic pests are masters of stealth, quickly colonizing your green space before you even notice the initial signs of damage on your foliage.
Discover the common ways spider mites infiltrate your indoor and outdoor garden. Understanding their travel methods is the first step in protecting your plants from these persistent pests. While it is nearly impossible to keep your home entirely sterile, knowing their primary routes helps you create a defensive strategy that keeps your collection thriving and healthy throughout the year.
In this guide, we will break down the practical steps you can take to identify an infestation early and prevent these arachnids from spreading. You will learn effective quarantine techniques for new plants, simple environmental adjustments to discourage mite growth, and reliable organic treatments to restore your garden. Let’s dive into the essential care practices every gardener needs to master.

The Airborne Travel Method
One of the most frustrating aspects of spider mites is their ability to appear on healthy plants seemingly out of nowhere. Unlike larger pests that crawl from leaf to leaf, spider mites utilize a sophisticated, passive transportation method known as “ballooning.” This mechanism allows them to travel significant distances on nothing more than a breeze.
When a spider mite colony becomes overcrowded or their current host plant begins to decline, the mites seek higher ground. They climb to the tip of a leaf or stem and release a fine, silken thread into the air. This thread acts like a sail, catching passing wind currents and lifting the tiny mite off the plant. Once airborne, they can be carried across gardens, between balconies, or even into open windows, eventually landing on a new, unsuspecting host.
Because this process is entirely dependent on air movement, you can take specific, practical steps to reduce the likelihood of an infestation:
- Monitor airflow: While good ventilation is essential for plant health, avoid placing sensitive plants directly in the path of strong, outdoor gusts if you know your area has a high mite population.
- Use physical barriers: If you are growing plants outdoors or near open windows, fine-mesh insect netting can prevent mites from landing on your foliage.
- Maintain humidity: Spider mites thrive in hot, dry, and stagnant conditions. Regularly misting your plants or using a humidifier makes the environment less attractive to mites that land on your leaves.
- Inspect new arrivals: Always quarantine new plants for at least two weeks. Even if a plant looks clean, it may be carrying “hitchhiker” mites that landed via ballooning before you brought it home.
By understanding that spider mites can arrive via the air, you can shift your gardening strategy from reactive to proactive. Regular leaf inspections—specifically checking the undersides of foliage for tiny webbing or speckling—remain your best defense against these microscopic travelers.
Human and Pet Transportation
Spider mites are masters of hitchhiking. Because these pests are microscopic, they can easily cling to surfaces you would never suspect. If you have spent time in an infested garden, a nursery, or even a local park, you may be unknowingly acting as a transport vessel for these arachnids.
The most common way mites enter a home or greenhouse is through physical contact. When you brush against infested foliage, the mites—or their sticky, nearly invisible webbing—adhere to your clothing. They can remain tucked away in the fibers of your pants, shirts, or jackets until you walk past your favorite indoor houseplants, providing the perfect opportunity for them to jump ship.
Your pets are equally likely to bring unwanted guests inside. Mites easily latch onto fur as your dog or cat brushes against outdoor shrubs or tall grasses. Once your pet returns indoors and curls up near your indoor plant collection, the mites can crawl off and begin colonizing your greenery.
To minimize the risk of accidental transmission, consider these practical habits:
- Change your clothes: If you have been gardening or visiting a nursery, change into clean clothes before tending to your indoor plants.
- Brush your pets: Regularly groom your pets, especially after they have been playing in dense vegetation, to remove any hitchhiking pests.
- Check your shoes: Mites can hide in the treads of your shoes. Leave outdoor footwear near the entryway rather than walking them through your plant rooms.
- Isolate new arrivals: Treat any new plant—or even a bouquet of fresh flowers—as a potential carrier. Keep them in a separate room for at least two weeks to ensure they are mite-free before introducing them to your established collection.
By treating your clothing and pets as potential vectors, you can significantly reduce the likelihood of a sudden spider mite outbreak. Vigilance is your best defense against these tiny invaders, as preventing their entry is far easier than eradicating an established infestation.

New Plant Introductions
The most common way spider mites enter a home is through new plant acquisitions. Even if a nursery or garden center appears pristine, these microscopic pests are masters of camouflage. They thrive in the warm, dry environments of retail greenhouses, often hitching a ride on the undersides of leaves or within the dense webbing of a new purchase.
When you bring a new plant home, it is tempting to place it immediately among your established collection. However, skipping an isolation period is the fastest way to trigger a household infestation. Spider mites reproduce rapidly, and a single undetected female can start a colony that spreads to your healthy plants within days.
To protect your indoor garden, follow these essential steps whenever you bring home a new plant:
- Quarantine immediately: Keep the new plant in a separate room, away from your other greenery, for at least two to four weeks.
- Perform a deep inspection: Use a magnifying glass to check the undersides of leaves, the stems, and the junctions where leaves meet the main stalk. Look for fine webbing, tiny yellow stippling on the foliage, or minuscule moving specks.
- Wash the foliage: Gently wipe down the leaves with a damp cloth or give the plant a thorough, gentle shower with lukewarm water. This physical cleaning can dislodge hitchhiking mites before they establish a foothold.
- Monitor for symptoms: Watch for signs of stress, such as yellowing, curling, or dry, brittle leaves, which often indicate early pest activity.
By treating every new arrival as a potential carrier, you create a vital safety barrier for your existing plants. This simple act of patience prevents the stress and potential plant loss associated with a full-blown spider mite outbreak. If you do spot signs of an infestation during the quarantine period, treat the affected plant immediately before allowing it to join the rest of your collection. A proactive approach is always more effective than managing a widespread pest crisis later.
Safety and Prevention Measures
Prevention is your best defense against spider mites, as these tiny pests reproduce rapidly in dry, stagnant conditions. By implementing a consistent inspection and maintenance routine, you can stop infestations before they take hold.
Always quarantine new additions to your home. Keep any plant brought from a nursery or store in a separate room for at least two weeks. During this time, inspect the undersides of leaves—where mites prefer to hide—using a magnifying glass to check for fine webbing or stippling (tiny yellow dots). If you notice signs of pests, keep the plant isolated and begin treatment immediately.
Spider mites thrive in arid environments. You can discourage them by maintaining proper humidity levels around your plants. Grouping plants together creates a localized microclimate that increases ambient moisture, making the environment less hospitable for mites. Regularly misting leaves or using a humidifier can also help keep your foliage healthy and resilient.
When you encounter infested foliage, take these steps to manage the spread:
- Wear PPE: Always wear gloves when handling infested plants to avoid spreading mites or debris to other areas of your home.
- Prune carefully: Use sharp, sterilized pruning shears to remove heavily damaged leaves. Dispose of these clippings in a sealed bag rather than leaving them in your compost bin.
- Sanitize tools: After each cut, wipe your pruning blades thoroughly with rubbing alcohol. This prevents you from inadvertently transferring mites or pathogens from an infested plant to a healthy one.
Consistency is key. Regularly wiping down leaves with a damp cloth not only removes dust—which mites often use as cover—but also allows you to monitor the health of your plants closely. If you find a plant that is severely compromised, it is often safer to discard it entirely to protect the rest of your collection. By staying vigilant and keeping your tools clean, you create a hostile environment for pests and a thriving habitat for your greenery.
Identifying Infestations and Seeking Help
Spider mites are notoriously difficult to spot until they have established a significant presence. Because they are microscopic, you should look for the subtle symptoms they leave behind rather than the pests themselves. Early indicators include tiny, pale stippling or yellow dots on the upper surface of leaves, which occur as mites pierce plant cells to feed on sap. If you notice a dusty appearance or leaves that seem to lose their luster, inspect the undersides closely with a magnifying glass.
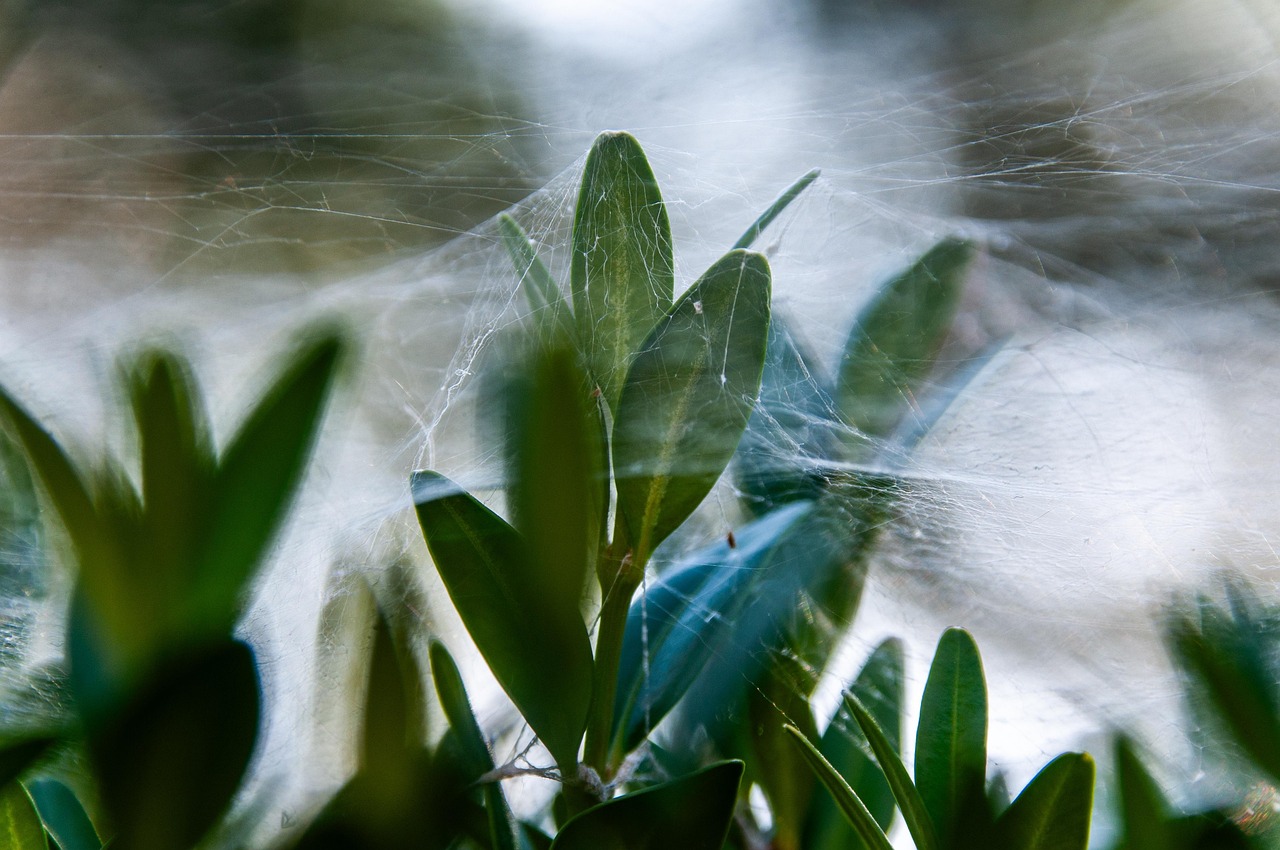
Webbing is the most definitive sign of an active infestation. While it often appears in the crotches of stems or between leaves, it is a sign that the mite population has already grown substantial. If you suspect mites, hold a white sheet of paper under a leaf and gently tap the foliage; if tiny specks fall onto the paper and begin to move, you have confirmed an infestation.
Once identified, you can manage minor outbreaks with targeted interventions:
- Insecticidal Soap: Effective for direct contact. Ensure you spray the undersides of leaves thoroughly, as this is where mites congregate.
- Neem Oil: Acts as a systemic deterrent and disrupts the mites’ life cycle. Apply during cooler parts of the day to avoid leaf burn.
- Physical Removal: Regularly wiping leaves with a damp cloth or using a strong stream of water can physically dislodge mites and disrupt their webbing.
Consistency is key, as these treatments typically require multiple applications spaced five to seven days apart to kill newly hatched eggs. However, if you notice severe leaf drop, widespread defoliation, or if the infestation persists despite repeated treatments, it is time to seek professional help. Consult a local nursery or a certified arborist if the plant is a large, established specimen or if the mites have spread to your entire collection. Sometimes, the most responsible horticultural choice is to discard a heavily infested plant to protect the health of your remaining garden.

Dedicated team of gardening enthusiasts with years of hands-on experience testing lawn mowers, gardening tools, and outdoor equipment. We help home gardeners and professionals alike make informed buying decisions with honest, thorough reviews. From push mowers to pruning shears, we test it all so you don’t have to. Got a gardening tool you’d like us to review? Get in touch!