
You should plant daffodil bulbs in the autumn, ideally six to eight weeks before the ground freezes. This timing allows the bulbs to establish strong roots in the cooling soil before winter dormancy, ensuring they bloom beautifully when the weather warms. Daffodils are a staple of the spring garden, offering reliable color year after year.
While these hardy perennials are famously easy to grow, success depends on providing the right environment. They thrive in well-draining soil and require a sunny spot to store energy for next season’s growth. Understanding these basic needs helps you avoid common pitfalls like bulb rot, setting the stage for a spectacular, low-maintenance display.
This guide explains the optimal timing and planting techniques to ensure your bulbs thrive in your specific landscape. We will cover essential topics, including proper planting depth, correct spacing, and soil preparation tips. Follow these practical steps to master the process and enjoy a vibrant, professional-looking garden that returns to brighten your yard every single spring.

The Best Time to Plant Daffodil Bulbs
To ensure a vibrant display of daffodils come spring, timing is everything. These bulbs require a specific period of cold dormancy to trigger their growth cycle. If you plant them too early while the soil is still hot, they may rot or sprout prematurely. If you wait until the ground is frozen, you will find it nearly impossible to dig the necessary holes.
The ideal window for planting daffodil bulbs is throughout the autumn, specifically from late September through November. In most climates, this timeframe ensures the soil is cool enough to prevent fungal issues but still workable enough to allow for proper root development.
Planting during this autumn window provides several distinct advantages for your garden:
- Root Establishment: Even as top growth slows down, daffodils continue to grow roots in cool soil. Giving them several weeks before a hard frost allows them to anchor firmly in the ground.
- Energy Conservation: By settling in before winter, the bulbs can focus their stored energy entirely on producing strong stems and flowers once the temperatures rise in spring.
- Nutrient Uptake: Established roots are better prepared to absorb moisture and nutrients from the soil as soon as the frost thaws.
A simple rule of thumb is to aim for planting at least two to four weeks before your area’s first hard ground freeze. If you live in a region with very mild winters, you may need to chill your bulbs in a refrigerator for several weeks before planting to simulate the necessary cold dormancy period. However, for most gardeners, nature provides the perfect temperature drop right on schedule.
Keep an eye on your local weather forecast as November approaches. If you find yourself running late, it is still generally better to get the bulbs into the ground than to leave them in storage, provided you can still break through the soil surface. Once planted, cover the area with a layer of mulch to help regulate soil temperature and protect your investment through the winter months.
Selecting the Right Location and Soil
Choosing the right location is the most important step in ensuring your daffodils return year after year. These resilient perennials require a site that receives full sun to partial shade. While they can tolerate some dappled light, they perform best when they receive at least six hours of direct sunlight daily. This energy is essential for the bulbs to store enough nutrients to bloom successfully the following spring.
Equally important is the quality of your soil. Daffodils are highly susceptible to rot if left in standing water. They require well-draining soil to remain healthy during their dormant winter months. Before you dig, test your soil’s drainage by observing how quickly water disappears after a heavy rain. If you notice puddles lingering for hours, you must improve the drainage before planting.
If your garden features heavy clay soil, do not be discouraged. You can easily amend the site to create a hospitable environment for your bulbs:
- Incorporate organic matter: Mix in generous amounts of compost, leaf mold, or aged manure. This breaks up dense clay particles and creates air pockets for roots.
- Add grit or sand: For extremely heavy soil, adding horticultural grit or coarse sand can further assist with water movement away from the bulb.
- Create raised beds: If the drainage issue is severe, planting in a raised garden bed or a slightly mounded area is the safest way to prevent bulb rot.
Aim for a soil pH that is slightly acidic to neutral, ideally between 6.0 and 7.0. If you are uncertain about your soil composition, a simple home testing kit can provide clarity. By preparing your site correctly, you eliminate the biggest threats to your bulbs and set the stage for a vibrant, long-lasting display. Remember, a little extra effort during the planting phase saves significant time and frustration later, ensuring your daffodils establish a strong, healthy root system before the ground freezes.

Step-by-Step Planting Guide
Planting daffodils is a straightforward process that rewards you with reliable blooms year after year. Before you begin, ensure you are wearing sturdy gardening gloves. This simple step protects your hands from blisters and potential skin irritation caused by the sap of daffodil bulbs. Additionally, always check that your trowel or bulb planter is clean and free of rust to prevent introducing soil-borne pathogens to your garden beds.
Follow these steps to ensure your bulbs are positioned for success:
- Measure the depth: Dig a hole approximately three times as deep as the height of the bulb. For most standard daffodils, this translates to a depth of 6 to 8 inches. Planting at this depth protects the bulb from temperature fluctuations and prevents them from being disturbed by surface activity.
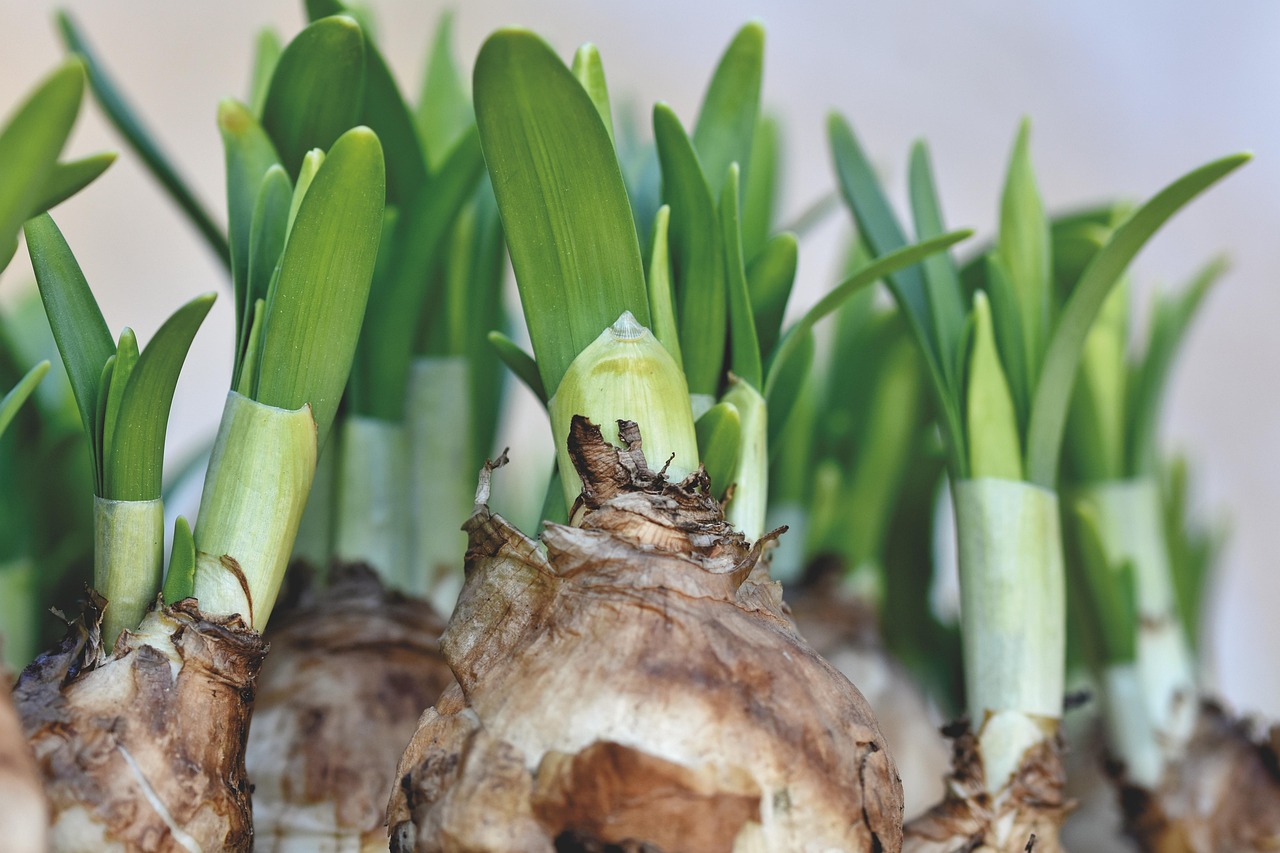
- Orient the bulb: Place the bulb into the hole with the pointed, narrow end facing upward. This is the shoot where the leaves and flowers will emerge. The flat, often slightly concave side—the root plate—should face downward toward the soil.
- Backfill and secure: Gently cover the bulb with the excavated soil. Once filled, press down firmly with your hands or the back of a rake to eliminate large air pockets. This ensures good contact between the bulb and the surrounding earth, which is vital for root development.
After planting, water the area thoroughly to settle the soil. If you are planting in a cluster, space the bulbs about 3 to 6 inches apart, depending on the desired density of your display. Proper spacing allows for adequate airflow and prevents the bulbs from competing for nutrients as they multiply over time. Once the task is complete, clean your tools thoroughly and store them in a dry place to maintain their longevity. By following these precise steps, you provide your daffodils with the stable foundation they need to thrive through the winter and emerge vigorously in the spring.
Spacing and Depth Requirements
To achieve a professional, naturalized appearance in your landscape, avoid planting daffodils in rigid, straight rows. Instead, group them in informal clusters or drifts. This mimics how bulbs grow in the wild and creates a more visually appealing display when they bloom in early spring.
When determining how far apart to place your bulbs, consider the size of the specific variety you have purchased. Generally, follow these spacing guidelines:
- Small varieties: Space bulbs 3 inches apart.
- Standard/Large varieties: Space bulbs 5 to 6 inches apart.
Proper spacing is essential for the long-term health of your garden. If bulbs are planted too close together, they will quickly become overcrowded. Overcrowding forces the bulbs to compete aggressively for soil nutrients and moisture, which often leads to smaller, stunted blooms or a complete failure to flower in subsequent years. Adequate space ensures each bulb has enough energy reserves to produce a robust display.
Regarding depth, the rule of thumb is to plant daffodil bulbs at a depth roughly three times the height of the bulb itself. For most standard bulbs, this means placing the bottom of the bulb about 6 inches below the soil surface. Larger bulbs should be planted slightly deeper, while smaller varieties may only require 4 to 5 inches of soil coverage.
Always ensure the pointed end of the bulb is facing upward. If you are uncertain which end is the top, planting the bulb on its side is a safe alternative; the shoot will naturally find its way toward the surface. Once positioned, cover the bulbs with soil and press down firmly to eliminate any large air pockets. Proper depth protects the bulbs from extreme temperature fluctuations during the winter and ensures they remain stable as they begin to develop their root systems. By following these simple measurements, you create the ideal foundation for a thriving, perennial daffodil display that will return reliably each spring.
Follow-up Care and Common Questions
Once your daffodil bulbs are securely in the ground, give the area a thorough watering. This settles the soil around the bulbs, removing air pockets and encouraging immediate root growth. After this initial soak, daffodils typically require little intervention until the following spring.
The most critical aspect of long-term care occurs after the flowers fade. It is tempting to trim the foliage for aesthetic reasons, but you must resist this urge. The leaves are essential for photosynthesis, which allows the bulb to store the energy required to produce blooms next season.
Follow these best practices to ensure your daffodils return year after year:
- Wait for yellowing: Leave the foliage in place until it turns yellow and begins to wither naturally. This process usually takes about six weeks after flowering.
- Clean up: Once the leaves have completely turned brown and brittle, you can gently pull them away or snip them off at the soil line.
- Avoid over-fertilizing: Daffodils are hardy and generally do not need heavy feeding. A light application of a balanced bulb fertilizer in early spring as shoots emerge is usually sufficient.
While daffodils are largely pest-resistant, issues can occasionally arise. If you notice stunted growth, distorted leaves, or holes in the bulbs, you may be dealing with pests like the narcissus bulb fly or soil-borne fungal diseases. Because these problems can be difficult to identify without inspection, avoid applying generic pesticides. Instead, contact your local university extension office or a master gardener program.
These experts can provide specific diagnostic help tailored to your region’s soil and climate conditions. Providing a physical sample or a clear photograph of the affected plant will help them determine if the issue is a temporary environmental stressor or a more serious infestation. By monitoring your garden closely during the growing season, you can catch these issues early and protect the health of your bulb display for many seasons to come.

Dedicated team of gardening enthusiasts with years of hands-on experience testing lawn mowers, gardening tools, and outdoor equipment. We help home gardeners and professionals alike make informed buying decisions with honest, thorough reviews. From push mowers to pruning shears, we test it all so you don’t have to. Got a gardening tool you’d like us to review? Get in touch!