
Discover the ideal window for planting Fritillaria uva-vulpis bulbs to ensure a successful display of these unique, fox-grape colored flowers in your spring garden. You should plant these hardy bulbs in the autumn, specifically between September and November, before the ground freezes. This timing allows the roots to establish properly during the cooler months.
While these charming bulbs are relatively easy to grow, they require specific conditions to truly thrive in your landscape. They prefer well-draining soil and a spot that receives partial shade to full sun. Keep in mind that patience is key, as these perennials often take a full season to settle in before blooming.
In this guide, we provide essential tips on soil preparation, planting depth, and long-term maintenance to help your fritillaria flourish. We will walk you through the practical steps of bulb placement and ongoing care strategies. Follow these expert recommendations to enjoy a vibrant, healthy display of these distinctive, bell-shaped blooms every single spring.

The Ideal Planting Window for Fritillaria uva-vulpis
Timing is critical when establishing Fritillaria uva-vulpis in your garden. To ensure these unique, bell-shaped blooms return reliably each spring, you must prioritize autumn planting. The ideal window for getting these bulbs into the ground is between September and November.
Planting during this specific period is essential because it allows the bulbs to settle before the onset of harsh winter temperatures. As the soil cools, the bulbs focus their energy on developing a robust root system. This early establishment is the foundation for healthy foliage and vibrant flowering once the weather warms.
If you plant too early while the soil is still warm, you risk encouraging premature top growth or exposing the bulbs to fungal issues. Conversely, planting too late—after the ground has begun to freeze—prevents the roots from anchoring properly, often resulting in weak or nonexistent blooms.
To achieve the best results, follow these practical steps:
- Check your local frost dates: Aim to plant at least four to six weeks before your soil typically freezes solid.
- Monitor soil conditions: Ensure the ground is workable and not waterlogged. If your soil is heavy clay, mix in horticultural grit to improve drainage, as these bulbs are susceptible to rot in stagnant moisture.
- Depth matters: Plant the bulbs approximately 4 to 6 inches deep. A good rule of thumb is to bury them at a depth three times the height of the bulb.
- Spacing: Position the bulbs about 4 to 6 inches apart to allow sufficient airflow and room for naturalizing.
By respecting this autumn planting window, you provide your Fritillaria uva-vulpis with the stability they need to thrive. Once planted, mulch the area lightly to insulate the soil and maintain consistent moisture levels throughout the winter months. With this simple preparation, you set the stage for a successful display when the growing season begins.
Essential Tools and Safety Precautions
Successful planting of Fritillaria uva-vulpis requires the right equipment to ensure your bulbs are placed at the correct depth and spacing without damaging the delicate bulb tissue. Before you begin, gather your essential tools to streamline the process and minimize physical strain.
For most garden beds, a sturdy garden trowel is sufficient for digging individual holes. However, if you are planting a large drift of bulbs, a specialized bulb planter is highly recommended. This tool allows you to remove a precise plug of soil, ensuring a consistent depth of approximately four to six inches, which is ideal for this species.
To ensure a safe and efficient planting experience, keep these guidelines in mind:
- Wear durable gardening gloves: Always use thick, puncture-resistant gloves. These protect your hands from sharp stones, hidden debris, and potential skin irritants found in the soil.
- Use eye protection: If you choose to use a mechanical bulb auger attached to a power drill, safety glasses are non-negotiable. They shield your eyes from flying soil, grit, and small pebbles kicked up by the spinning bit.
- Operate power tools carefully: When using an auger, maintain a firm grip and always keep your hands and loose clothing well clear of the drill bit while the tool is powered on.
- Maintain tool hygiene: Clean your trowel or planter after use to prevent the spread of soil-borne pathogens between different areas of your garden.
Proper preparation not only protects you from injury but also ensures the bulb is nestled securely in the earth. Once your hole is prepared, place the bulb with the pointed end facing upward and cover it gently with soil. Avoid packing the earth down too firmly, as this can impede root development. By prioritizing safety and using the correct implements, you create the best possible foundation for your Fritillaria uva-vulpis to thrive when spring arrives.
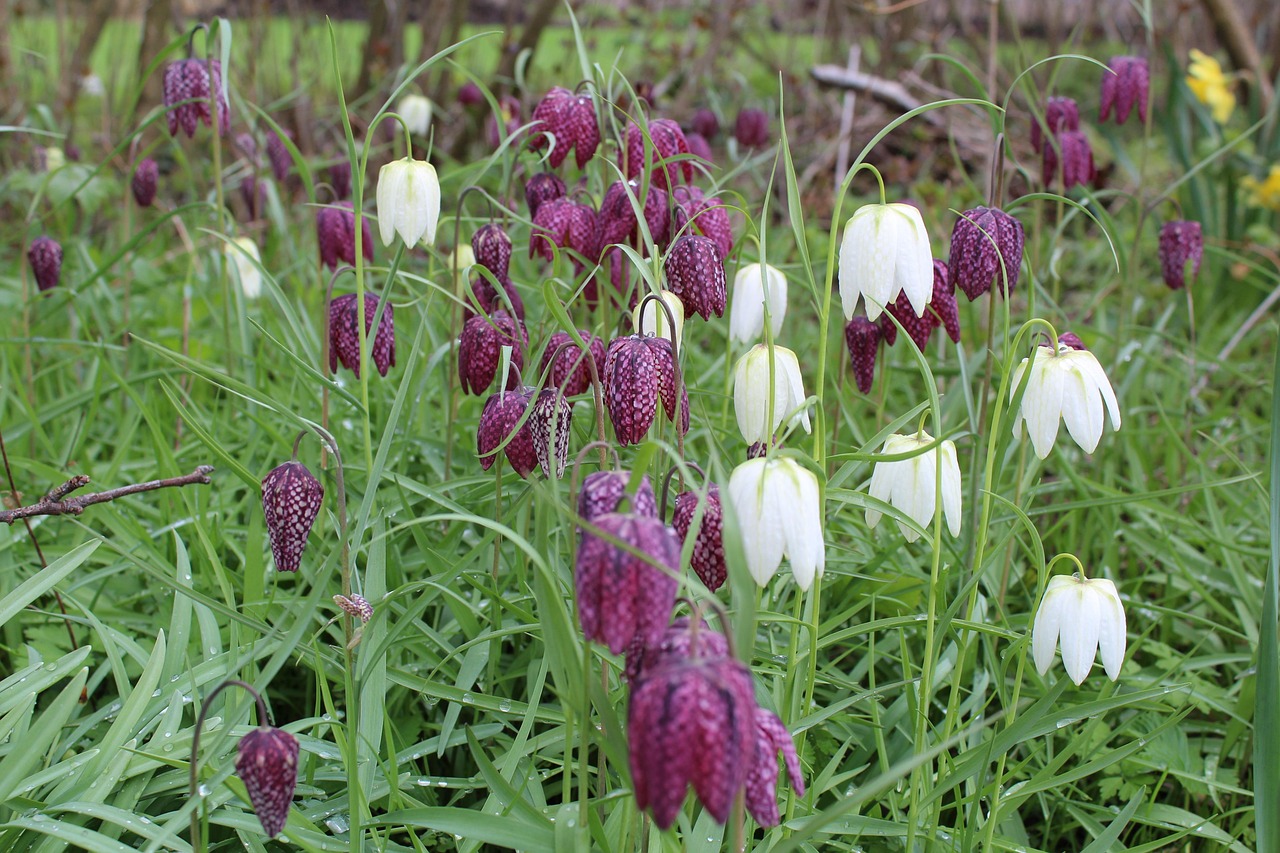
Selecting the Right Location
Selecting the ideal spot for your Fritillaria uva-vulpis is the most critical step in ensuring they return year after year. These charming, fox-grape lilies thrive when placed in locations that offer full sun to partial shade. In cooler climates, aim for a site with maximum sun exposure to encourage vigorous growth and bloom production. If you live in a region with scorching summers, providing light afternoon shade can help protect the foliage.
Beyond light requirements, soil composition is the deciding factor between success and bulb rot. Fritillaria uva-vulpis bulbs are highly sensitive to moisture; they will quickly succumb to decay if left in waterlogged conditions. Before you dig your planting holes, assess your soil drainage carefully.
If your garden features heavy clay soil, do not plant directly into it. Instead, take proactive steps to improve the structure and drainage capacity of the earth:
- Incorporate Organic Matter: Mix in generous amounts of well-rotted compost or leaf mold. This helps break up dense clay particles and improves soil aeration.
- Add Inorganic Grit: For better drainage, blend horticultural grit, coarse sand, or perlite into the planting area. This creates pathways for excess water to move away from the bulb base.
- Consider Raised Beds: If your native soil is consistently soggy or prone to flooding, planting in a raised bed or a mound is the safest way to ensure the bulbs stay dry during their dormant phase.
When choosing your site, also consider the long-term environment. These plants prefer to be left undisturbed once established, so select a spot where they won’t be accidentally dug up during seasonal garden maintenance. A slightly elevated area or a slope is often perfect, as it naturally encourages water runoff. By prioritizing a well-draining environment now, you provide the foundation necessary for these bulbs to establish a strong root system and thrive when spring arrives.
Step-by-Step Planting Guide
Successfully planting Fritillaria uva-vulpis requires attention to detail during the autumn months. Before you begin, ensure your planting site offers well-draining soil and a location that receives full sun to partial shade. Proper preparation sets the foundation for healthy spring growth.
Follow these steps to plant your bulbs correctly:
- Prepare the hole: Dig a hole approximately 4 to 6 inches deep. These bulbs prefer to be buried deeper than many other spring-flowering varieties to protect them from temperature fluctuations.
- Position the bulb: Place the bulb into the hole with the pointed end facing upward. This orientation ensures the shoot can emerge efficiently toward the surface.
- Space appropriately: Maintain a distance of about 6 inches between each bulb. This spacing prevents overcrowding, which is essential for healthy airflow and nutrient absorption.
- Fill and firm: Gently fill the hole with soil. Use your hands to firm the earth down, ensuring the bulb is secure without compacting the soil too heavily.
- Water: Provide a light watering immediately after planting. This helps to settle the soil around the bulb and eliminates large air pockets that could cause the bulb to dry out or rot.
Once planted, these bulbs generally require little maintenance until they begin to sprout in the spring. Avoid overwatering the area during the winter dormancy period, as Fritillaria bulbs are susceptible to rot if left in waterlogged soil. If your garden soil is heavy or prone to staying wet, consider adding a handful of horticultural grit or sand to the bottom of the planting hole to improve drainage.
By following these precise planting depths and spacing requirements, you provide your Fritillaria uva-vulpis with the stability needed to establish a strong root system before the ground freezes. With the right start, you can look forward to their unique, bell-shaped blooms appearing reliably each season.

Follow-up Care and Common Questions
Once your Fritillaria uva-vulpis bulbs are in the ground, apply a light, two-inch layer of organic mulch, such as shredded bark or leaf mold. This helps regulate soil temperature, prevents premature sprouting during mid-winter warm spells, and suppresses weeds that might compete with your plants for nutrients.
As spring approaches, monitor your garden for the first signs of green foliage. Patience is essential during this phase. Even after the flowers fade, you must resist the urge to trim the leaves. The foliage acts as a solar panel, capturing energy that the bulb stores to fuel next year’s blooms. Wait until the leaves have turned completely yellow and withered before gently pulling them away or snipping them at the base.
If you encounter issues during the growing season, follow these practical steps to protect your investment:
- Monitor for pests: While generally hardy, these bulbs can occasionally attract lily beetles. Inspect the undersides of leaves regularly and hand-pick any insects you find.
- Assess growth: If you notice stunted growth or yellowing leaves before the natural dormancy period, check your drainage. Fritillaria bulbs are highly susceptible to rot in waterlogged, heavy clay soils.
- Seek expert advice: If you suspect a fungal issue or nutrient deficiency, do not guess with chemical treatments. Contact your local university horticultural extension service. They can provide soil testing or identify specific bulb diseases prevalent in your microclimate, ensuring you use the safest and most effective solution.
By allowing the foliage to die back naturally and maintaining well-drained soil, you ensure that your Fritillaria uva-vulpis will return reliably year after year. These bulbs are low-maintenance perennials that thrive when left undisturbed in a consistent environment. Avoid over-fertilizing, as these plants prefer lean soil conditions. With these simple care habits, your garden will benefit from the unique, nodding blooms of this fox-grape fritillary for many seasons to come.

Dedicated team of gardening enthusiasts with years of hands-on experience testing lawn mowers, gardening tools, and outdoor equipment. We help home gardeners and professionals alike make informed buying decisions with honest, thorough reviews. From push mowers to pruning shears, we test it all so you don’t have to. Got a gardening tool you’d like us to review? Get in touch!