
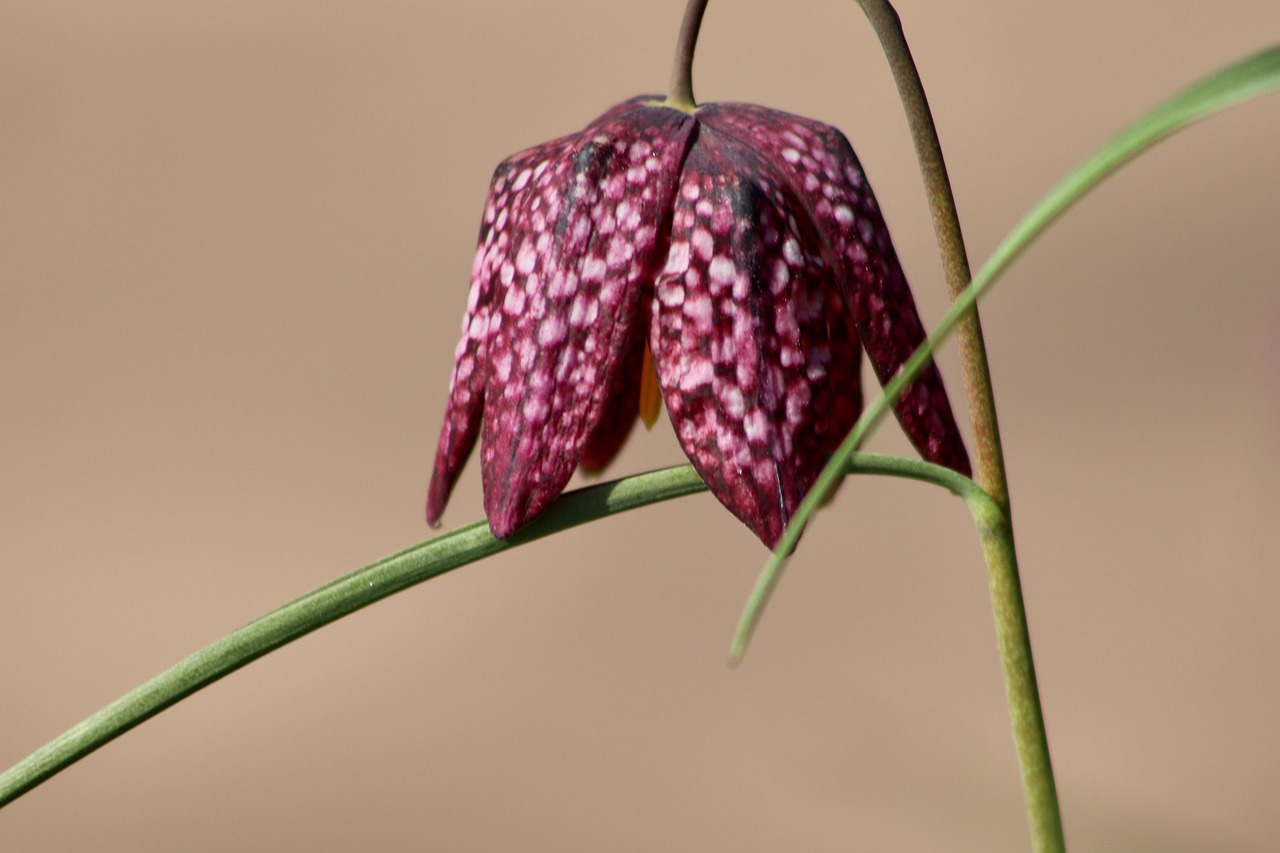
Fritillaria bulbs are best planted in the autumn, typically between September and October. This timing ensures the bulbs establish strong root systems before the ground freezes, allowing them to bloom beautifully in the spring. These prized perennials are well-loved by gardeners for their unique, bell-shaped flowers and striking, architectural stems that add height.
Successfully growing these plants requires patience and careful preparation, as they are not as forgiving as common daffodils. To ensure these striking perennials return year after year, timing your planting correctly is essential. You must provide them with well-draining soil and a location that mimics their native woodland or meadow environments.
This guide covers the ideal planting window, essential soil requirements, and crucial safety tips for handling bulbs. We will walk you through the proper planting depth and spacing needed to keep your garden healthy. By following these practical steps, you will be well-equipped to cultivate a stunning display of fritillaria in your own backyard.
The Ideal Planting Window for Fritillaria
To ensure your Fritillaria bulbs bloom successfully in the spring, timing is everything. These bulbs require a specific window to establish their root systems before the soil temperature drops significantly. The ideal time to plant Fritillaria is during the autumn, specifically between September and November.
Fritillaria bulbs are unique because they need a period of cold dormancy to trigger their development. By planting them in the fall, you allow the bulbs to settle into the earth while the soil is still workable but cooling down. This natural cooling process is essential for healthy growth.
Adhering to this window helps you avoid two common gardening pitfalls:
- Planting too early: If you put the bulbs in the ground while the soil is still warm, they may attempt to produce premature green shoots. These tender sprouts are highly susceptible to frost damage once winter arrives, which can weaken or kill the bulb.
- Planting too late: If you wait until the ground is frozen or nearly frozen, the bulbs will not have sufficient time to develop a robust root system. Without established roots, the bulbs may struggle to absorb the necessary nutrients to support a strong flower stalk in the spring.
In regions with particularly early winters, aim to complete your planting by mid-October. If you live in a milder climate, you can safely extend your planting window into November. As a general rule of thumb, aim to get your bulbs into the ground at least four to six weeks before the first hard frost is expected in your area.
If you find yourself with bulbs late in the season, it is still worth planting them rather than discarding them. While they may not perform at their peak during the first year, they will often recover and establish themselves over subsequent seasons. Always handle Fritillaria bulbs with care, as they are fragile and prone to bruising, which can lead to rot if the bulb is damaged before planting.
Selecting and Preparing Your Planting Site
Success with fritillaria begins with choosing the right environment. These bulbs are highly sensitive to moisture levels; if left in waterlogged soil, they will rot quickly. Prioritize a site with excellent drainage, such as a raised bed or a sloped area, to ensure excess water moves away from the roots.
Most fritillaria varieties perform best in locations that offer full sun to partial shade. If you are gardening in a warmer climate, aim for a spot that receives morning sun but stays protected from the intense heat of the afternoon. In cooler regions, a full-sun position is usually ideal to encourage strong growth and consistent blooming.
Before you begin digging, prepare your workspace to ensure the bulbs have the best possible start:
- Clear the entire area of weeds, grass, and surface debris. Weeds compete for nutrients and can harbor pests that threaten young bulbs.
- Loosen the soil thoroughly. If your ground is hard or heavily compacted, the bulbs will struggle to establish a healthy root system.
- Use a sturdy hand trowel or a specialized bulb planter to create uniform holes. This allows for precise depth control, which is vital for winter survival.
- Always wear durable gardening gloves. They provide a necessary barrier against sharp debris, hidden rocks, and the repetitive friction that leads to blisters during planting.
Once the soil is loose and free of obstructions, you can easily plant your bulbs at the recommended depth. For most fritillaria, a good rule of thumb is to plant them at a depth three times the height of the bulb. If your soil is particularly heavy, consider mixing in a small amount of horticultural grit or compost to improve drainage further. Taking these small, practical steps during site preparation significantly reduces the risk of bulb loss and sets the stage for a vibrant, healthy display when spring arrives.

Step-by-Step Planting Instructions
Proper planting technique is essential for ensuring your fritillaria bulbs establish a strong root system before winter. Follow these steps to give your bulbs the best start in your garden.
First, prepare your planting area by loosening the soil to a depth of about 10 to 12 inches. Fritillaria bulbs require well-draining soil to prevent rot, so incorporate organic compost if your garden bed is heavy or clay-based.
When you are ready to plant, follow these specific guidelines for orientation and depth:
- Calculate depth: Dig a hole approximately three times the height of the bulb. This depth provides necessary insulation and protection from fluctuating soil temperatures.
- Positioning: Place the bulb in the hole with the pointed, growing end facing upward. If you cannot identify the top, planting the bulb on its side is a safe alternative; the shoot will naturally curve toward the surface.
- Spacing: Space bulbs 6 to 10 inches apart, depending on the variety, to allow for proper airflow and growth.
Safety is a priority when working with garden tools. Always use a sturdy trowel or spade, and ensure your movements are directed away from your body to prevent accidental injury. Keep your tools clean and free of rust by wiping them down with a damp cloth and drying them thoroughly after each use. A clean tool not only lasts longer but also makes digging through soil much more efficient.
Once the bulbs are in place, backfill the hole with soil and press down gently to remove large air pockets. Water the area lightly to settle the soil around the bulbs. Avoid overwatering at this stage, as the bulbs do not need excessive moisture until they begin active growth in the spring. Finally, mark the area with a small garden stake so you do not accidentally disturb the soil while planting other spring-blooming annuals or perennials later in the season.
Safety Precautions When Handling Bulbs
While fritillaria bulbs are a stunning addition to any spring garden, they require careful handling to ensure both your safety and the well-being of your household pets. Certain species contain compounds that can cause mild skin irritation or allergic reactions upon contact. To protect yourself, always wear gardening gloves whenever you are handling, inspecting, or planting these bulbs.
If you have pets, it is essential to exercise extra caution. Fritillaria bulbs are toxic if ingested by dogs or cats. To prevent accidental poisoning, follow these practical safety guidelines:
- Secure Storage: Keep bulbs in a sealed container or high shelf, well out of reach of curious pets, until you are ready to plant them.
- Deep Planting: Follow the specific depth recommendations for your chosen variety. Planting them deeply—typically at least 6 to 8 inches—not only encourages better growth but also makes it significantly harder for animals to dig them up.
- Site Protection: If you have pets that enjoy digging, consider placing a piece of chicken wire or hardware cloth just below the soil surface over the planting area. This acts as a physical barrier while still allowing the foliage to emerge safely in the spring.
- Supervision: Keep a close eye on pets when working in the garden. Ensure no stray bulbs are left sitting on the soil surface or dropped on the grass during the planting process.
If you suspect that a pet has ingested any part of a fritillaria bulb, contact your veterinarian immediately. Prompt action is the best way to handle potential toxicity concerns.
By taking these simple, proactive steps, you can enjoy the unique beauty of these architectural flowers without compromising the safety of your home environment. Always wash your hands thoroughly with soap and water after finishing your gardening tasks, even if you wore gloves, to remove any residual plant oils or soil debris.

Follow-up Care and Common Questions
After placing your fritillaria bulbs at the correct depth, provide a light watering to help settle the soil and eliminate large air pockets. Once this initial hydration is complete, resist the urge to water frequently. During the winter months, these bulbs remain dormant and prefer relatively dry conditions. Excess moisture in the soil during their resting phase can lead to bulb rot, which is a common cause of failure.
If spring arrives and your fritillaria fail to emerge, investigate the planting site before assuming the bulbs are dead. Common culprits include:
- Poor Drainage: Fritillaria require well-draining soil. If the area remains waterlogged, the bulbs may have decayed.
- Rodent Activity: Squirrels, voles, and mice are often attracted to newly planted bulbs. If you notice disturbed soil, consider using hardware cloth or wire cages next season to protect them.
- Depth Issues: Bulbs planted too shallow may be susceptible to temperature fluctuations, while those planted too deep may struggle to push through the soil surface.
Keep a close eye on emerging shoots as the weather warms. If you spot signs of pests, such as aphids or lily beetles, address them early by hand-picking the insects or using an appropriate, plant-safe horticultural soap. Regular observation allows you to catch minor issues before they compromise the health of the entire plant.
If you encounter persistent problems with plant vigor, stunted growth, or recurring soil drainage issues, do not hesitate to reach out for professional help. Your local agricultural extension office is an excellent resource for region-specific guidance. They can provide expert advice on soil amendments, local pest management strategies, and climate-appropriate care tailored to your specific gardening zone. By monitoring your garden closely and intervening only when necessary, you give your fritillaria the best chance to thrive and return with beautiful blooms year after year.

Dedicated team of gardening enthusiasts with years of hands-on experience testing lawn mowers, gardening tools, and outdoor equipment. We help home gardeners and professionals alike make informed buying decisions with honest, thorough reviews. From push mowers to pruning shears, we test it all so you don’t have to. Got a gardening tool you’d like us to review? Get in touch!