
Spider mites can quickly damage your indoor plant collection, but they are preventable with the right habits. You can stop these tiny pests by maintaining proper humidity levels and regularly inspecting your foliage for early signs of webbing. Taking proactive steps now will save your favorite houseplants from severe damage later.
While no indoor environment is entirely immune to pests, you can significantly reduce the risk through consistent care routines. Spider mites thrive in hot, dry conditions, making them particularly common during winter months when indoor heating is active. Understanding these environmental triggers is the first step toward building a resilient, pest-free indoor garden.
This guide explains how to create an environment that discourages these pests and keeps your plants thriving year-round. We will explore practical strategies, ranging from simple cleaning techniques to natural deterrents that protect your greenery. Follow these actionable tips to master plant care and ensure your botanical collection remains healthy, vibrant, and completely mite-free.

Maintain Optimal Humidity Levels
Spider mites are notorious for thriving in hot, arid environments. Because they lack a waxy cuticle to retain moisture, these pests quickly dehydrate and die when exposed to higher humidity levels. By maintaining an ambient humidity range between 40% and 60%, you create an environment that is hostile to spider mites while remaining comfortable for most tropical houseplants.
Monitoring your home’s air quality is the first step. During winter months, indoor heating systems often drop humidity levels well below 30%, which acts as an open invitation for mite infestations. If your air feels dry, consider these practical strategies to boost moisture levels around your greenery:
- Use a room humidifier: This is the most consistent way to manage humidity. Place a cool-mist humidifier near your plant collection to raise the moisture content of the surrounding air effectively.
- Create a pebble tray: Fill a shallow tray with pebbles and add water until it reaches just below the top of the stones. Place your potted plant on top of the pebbles. As the water evaporates, it creates a localized pocket of humidity directly around the foliage. Ensure the pot base never sits directly in the water to prevent root rot.
- Group plants together: Plants naturally release moisture through a process called transpiration. By clustering your plants, you create a beneficial microclimate where the collective moisture raises the humidity level in the immediate area.
- Mist sparingly: While many gardeners mist their plants, this only provides a temporary spike in humidity and can sometimes encourage fungal growth if the leaves remain wet for too long. Prioritize the methods above for long-term protection.
Consistent humidity not only deters spider mites but also promotes lush, healthy growth. By stabilizing your indoor environment, you reduce plant stress, making your collection more resilient against potential pest outbreaks. Check your humidity levels regularly with a simple hygrometer to ensure your plants stay within that protective 40% to 60% range.
Keep Foliage Clean and Dust-Free
Dust is more than just an aesthetic nuisance for your indoor plants. When a layer of grime settles on your foliage, it blocks sunlight from reaching the chlorophyll, effectively starving the plant of the energy it needs to grow. Beyond hindering photosynthesis, a dusty plant is a prime target for spider mites. These pests thrive in the debris, using the film of dust as cover to hide from predators and establish their colonies undisturbed.
Regularly cleaning your plant leaves is one of the most effective preventative measures you can take. By keeping the surface of the leaves pristine, you remove the protective layer that mites rely on and make the environment far less hospitable for them to settle.
To clean your plants safely and effectively, follow these steps:
- Use a soft, lint-free cloth dampened with room-temperature water. Avoid using harsh soaps or oils, which can clog the plant’s stomata (the pores used for breathing).
- Always place one hand underneath the leaf you are cleaning. By providing firm support from below, you prevent the leaf from bending, snapping, or tearing under the pressure of your wiping motion.
- Gently wipe both the top and the underside of the leaf. Spider mites almost exclusively congregate on the undersides, so this area requires the most attention.
- If your plant is small and hardy, you can occasionally place it in the shower or sink and use a gentle, lukewarm spray to rinse the foliage. Ensure you allow the plant to air dry in a well-ventilated area to prevent fungal issues.
Aim to inspect and wipe down your plants at least once every two weeks. This routine not only keeps your plants vibrant and healthy but also gives you a regular opportunity to spot the early signs of a mite infestation, such as fine webbing or tiny yellow stippling on the leaves. Catching these issues early is the key to maintaining a pest-free indoor garden.

Implement a Quarantine Routine for New Plants
Bringing a new plant into your home is exciting, but it is also the most common way spider mites enter your collection. These microscopic pests are expert hitchhikers, often arriving on nursery stock undetected. To protect your established plants, you must treat every new arrival as a potential infestation risk.
The most effective strategy is a strict 14-day quarantine protocol. Place any new plant in a separate room, away from your existing greenery. Do not place them on the same shelf or near shared airflow, as spider mites can travel on currents or via physical contact between foliage.
During this two-week isolation period, perform frequent, thorough inspections. Spider mites thrive in warm, dry conditions and often go unnoticed until damage is severe. Use a magnifying glass if necessary to check for the following warning signs:
- Fine webbing: Look closely at the crotches where leaves meet the stems and the undersides of leaves. This silk is often the first visual indicator of a colony.
- Stippling: Inspect the foliage for tiny, pale yellow or white dots. These indicate areas where mites have pierced the leaf tissue to feed on plant sap.
- Discoloration: Watch for leaves that appear dull, bronzed, or prematurely yellowed, which often signals an advanced infestation.
While the plant is in quarantine, avoid misting it excessively, as this can sometimes mask early symptoms. Instead, wipe the leaves down with a damp cloth to remove dust and potential pests. If you notice any webbing or stippling during your observation period, treat the plant immediately with insecticidal soap or neem oil before even considering moving it near your other plants.
By maintaining this 14-day buffer, you break the cycle of pest introduction. It is far easier to manage a single isolated plant than it is to eradicate a widespread spider mite outbreak across your entire indoor jungle. Patience during this initial phase is the best insurance policy for your collection’s long-term health.
Regular Monitoring and Proper Watering
Spider mites thrive in dry, stagnant conditions. By maintaining a consistent care routine, you create an environment that is inhospitable to these pests. Healthy, well-hydrated plants possess stronger cell walls and better natural defenses, making them significantly less attractive to mite infestations.
Regular monitoring is your first line of defense. Spend a few minutes each week inspecting your plants, focusing specifically on the undersides of leaves where mites prefer to hide. Use a magnifying glass if necessary to spot the tiny, web-like structures or pale, stippled dots that indicate early feeding damage.
To keep your plants resilient, follow these practical care tips:
- Check soil moisture: Before watering, insert your finger an inch into the soil. If it feels dry, water thoroughly until it drains from the bottom of the pot. Avoid letting plants sit in standing water, as this leads to root rot.
- Increase ambient humidity: Mites despise moisture. Grouping plants together or using a pebble tray can raise local humidity levels, discouraging mites from settling.
- Clean foliage regularly: Gently wipe leaves with a damp cloth to remove dust. Dust buildup can stress the plant and provide cover for pests to multiply undetected.
If you discover leaves that are heavily infested or severely damaged, it is best to prune them away to prevent the mites from spreading to healthy growth. When using sharp pruning shears to remove this damaged foliage, always cut away from your body and keep your fingers clear of the blades at all times. Dispose of the clippings immediately in a sealed bag rather than leaving them near your other plants.
Consistency is the secret to success. If you notice a plant looking wilted or discolored despite proper watering, investigate immediately. Early detection allows you to isolate the plant and treat it before a minor issue becomes a major infestation. By keeping your indoor garden hydrated and clean, you make it much harder for spider mites to take hold.
Troubleshooting and When to Seek Professional Help
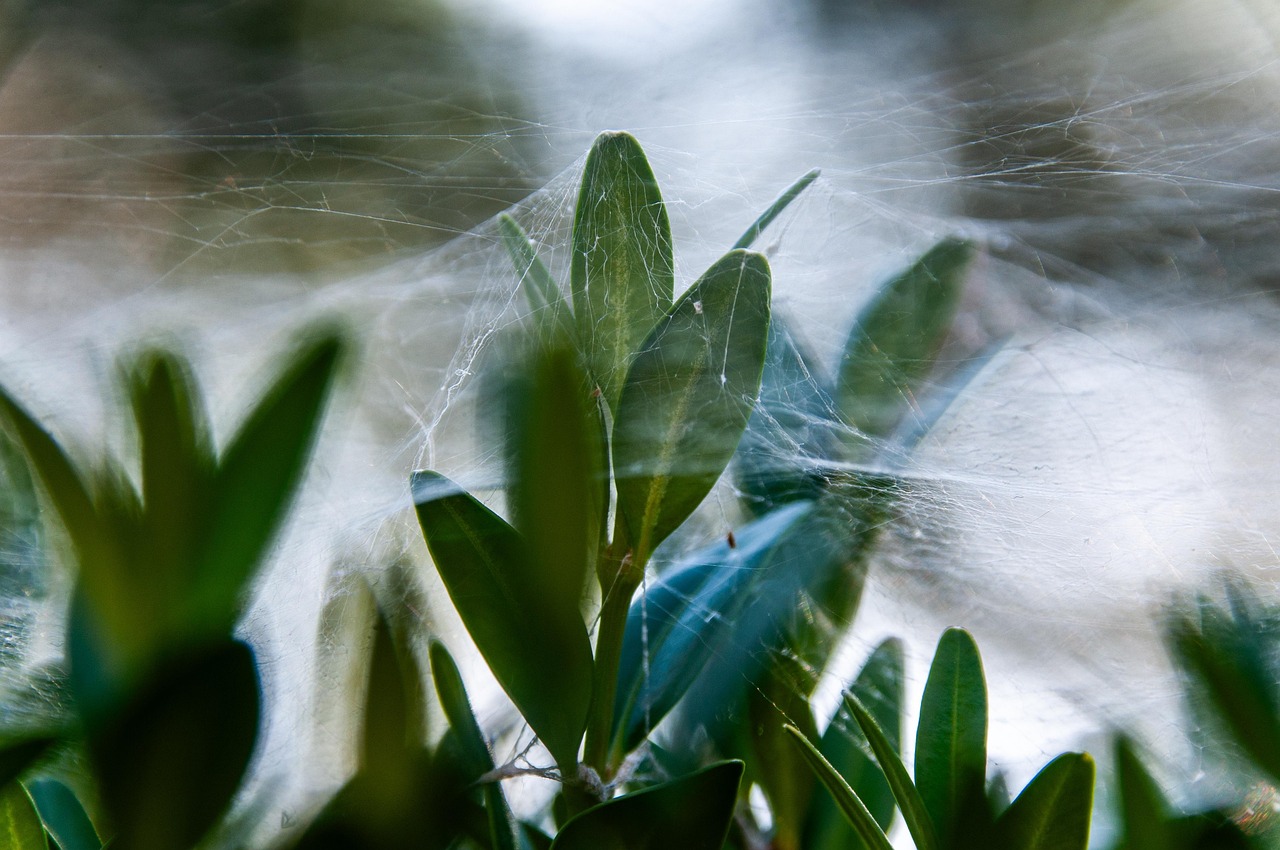
If you notice fine, silk-like webbing stretching between leaves or stems, you have likely identified a spider mite infestation. These pests thrive in dry, warm environments, so immediate action is necessary to prevent them from spreading to your other indoor plants.
For mild to moderate infestations, neem oil or insecticidal soap are highly effective, organic control methods. When applying these treatments, always prioritize your safety by following these guidelines:
- Wear nitrile gloves to prevent skin irritation from concentrated oils or soaps.
- Use a mask or respirator if you are spraying in an enclosed space to avoid inhaling fine mist particles.
- Apply treatments in a well-ventilated area, away from food preparation surfaces.
- Always follow the dilution instructions on the product label; stronger does not mean better and can damage delicate foliage.
Consistency is key. Because spider mite eggs are resistant to many treatments, you must reapply your chosen solution every five to seven days for at least three weeks to catch new hatchlings before they reach maturity.
However, there comes a point where treatment is no longer practical or safe for your collection. You should consider discarding a plant if:
- The infestation has caused significant leaf drop, yellowing, or severe structural damage.
- The plant is located in a hard-to-clean area where mites have likely migrated to neighboring pots.
- You have attempted multiple rounds of treatment without seeing a reduction in webbing or mite activity.
If a plant is severely compromised, it serves as a breeding ground that puts your entire indoor garden at risk. Sometimes, the most responsible gardening decision is to remove the infected host, bag it securely, and dispose of it immediately to protect the health of your remaining plants. If you are ever unsure about the severity of an infestation or the safety of a specific treatment for a rare or expensive specimen, consult with a local nursery professional or a certified master gardener.

Dedicated team of gardening enthusiasts with years of hands-on experience testing lawn mowers, gardening tools, and outdoor equipment. We help home gardeners and professionals alike make informed buying decisions with honest, thorough reviews. From push mowers to pruning shears, we test it all so you don’t have to. Got a gardening tool you’d like us to review? Get in touch!