
Attracting hummingbirds to your backyard is easier when you provide a source of misting water. This guide explains how to construct a simple, budget-friendly hummingbird mister using basic irrigation components, helping you create a refreshing oasis that draws these birds in for frequent visits throughout the hot summer months.
While you do not need expensive professional lawn care equipment or complex power tools to build this feature, you will need a few standard hand tools and basic plumbing supplies. Most homeowners can complete this project in under an hour, turning a simple garden hose connection into a bird-friendly sanctuary.
In the following sections, we break down the exact parts required for your DIY mister and provide step-by-step assembly instructions. Whether you are an experienced gardener or just starting your home maintenance journey, these practical tips will ensure your new hummingbird attraction operates efficiently while keeping your outdoor space hydrated.

Why Hummingbirds Love Misters
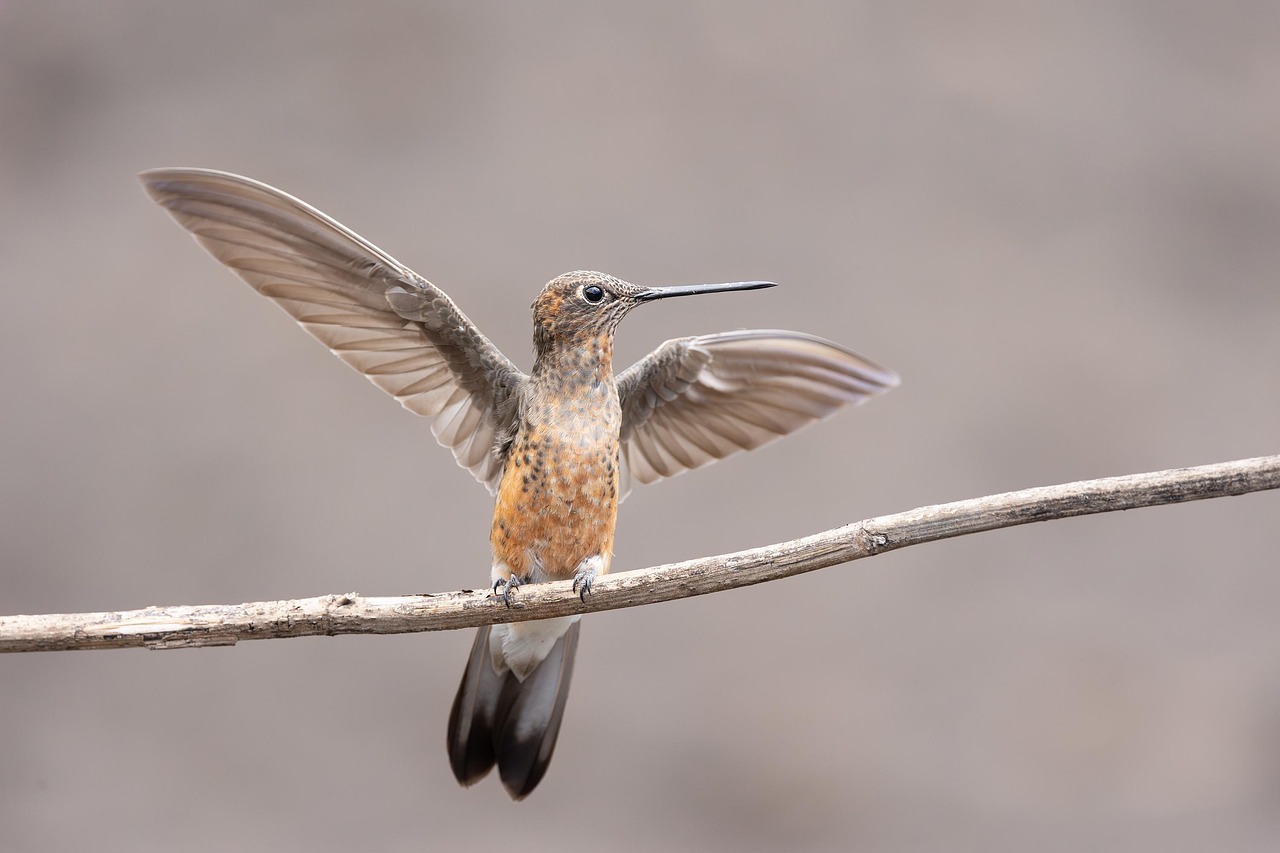
Hummingbirds have unique bathing habits that set them apart from most backyard songbirds. While a robin or cardinal will happily splash around in a traditional birdbath, hummingbirds avoid deep, standing water. Instead, they rely on their agility to clean their feathers by flying through fine mists. In the wild, they seek out morning dew on leaves or the light spray from a waterfall to groom themselves and regulate their body temperature.
By installing a mister, you are essentially replicating these natural conditions in your own backyard. These devices emit a constant, ultra-fine spray that allows hummingbirds to hover in the water, fluttering their wings to distribute moisture across their plumage. This process not only keeps their feathers clean and aerodynamic but also provides essential hydration during the heat of the day.
To make your garden a preferred destination for these active pollinators, consider these functional benefits of adding a mister to your landscape:
- Natural Grooming: The fine spray mimics the light rain and dew that hummingbirds instinctively seek for preening.
- Thermal Regulation: On scorching afternoons, the cooling effect of the mist helps hummingbirds manage their high metabolic rate.
- Increased Visibility: Because hummingbirds are highly territorial, a consistent water source often encourages them to linger in your garden, giving you more opportunities to observe their behavior.
- Attractant Synergy: When placed near nectar-rich flowers or your hummingbird feeders, a mister creates a complete habitat that encourages birds to stay longer.
When setting up your system, ensure the mist is directed toward a sturdy, leafy plant. Hummingbirds feel most secure when they can perch nearby to shake off excess water before returning to their feeding routine. Because hummingbirds are sensitive to water quality, it is important to keep your mister clean. If you are using a DIY system connected to a garden hose or a dedicated pump, ensure the nozzle is free of mineral buildup or debris. A clean, consistent spray will keep your local hummingbird population healthy and ensure they return to your garden throughout the season. By providing this specialized feature, you transform your outdoor space into a vital sanctuary that supports the natural behaviors of these remarkable birds.
Essential Tools and Materials
Building a custom hummingbird mister is a straightforward project that requires only a few specialized components and common garden maintenance tools. Using the right equipment ensures a steady, fine spray that attracts hummingbirds without wasting water or damaging your landscape.
Before you begin, gather the following essential parts:
- Low-flow misting nozzle: Look for a nozzle rated for low gallons-per-hour (GPH) to create the fine, fog-like spray hummingbirds prefer.
- 1/4-inch flexible irrigation tubing: This is the standard size for drip irrigation systems and is easy to route through garden beds.
- Hose adapter or faucet timer: An adapter connects the tubing to your outdoor spigot, while a timer allows you to automate the misting schedule.
- Stake or mounting bracket: A sturdy garden stake or a specialized mounting clip will hold the nozzle at the correct height and angle.
- Small zip ties: Use these to secure the tubing and nozzle firmly to your support structure.
You will also need a few basic hand tools to assemble your system safely and efficiently. A high-quality pair of garden shears is the most important tool for this task. Sharp blades are necessary to make clean, square cuts on the 1/4-inch tubing. If the cut is jagged or angled, the tubing may not seat properly into the nozzle or adapter, which can lead to leaks and pressure loss.
When working with outdoor power equipment or garden hoses, always ensure your water source is turned off before making connections. If you are integrating this mister into an existing drip irrigation line, verify that your system pressure is compatible with the nozzle rating. High-pressure lines may require a pressure regulator to prevent the tubing from popping off during operation.
Once you have your materials, lay out your tubing path through your garden maintenance area. Keep the tubing tucked under mulch or behind foliage to keep the setup discreet. Secure the nozzle to your stake using the zip ties, ensuring it is positioned over a leaf or a shallow birdbath where hummingbirds are likely to congregate. By selecting durable, UV-resistant irrigation components, you ensure your mister will withstand seasonal exposure and provide a reliable oasis for local wildlife throughout the warmer months.
Step-by-Step Assembly Instructions
Begin by attaching your irrigation adapter securely to your outdoor faucet. Ensure the connection is tight to prevent leaks, which can waste water and reduce pressure. If your faucet is already in use, you may need a two-way manifold to maintain access for your standard garden hose.
Next, connect the 1/4-inch vinyl tubing to the adapter. Carefully run the tubing along the ground or through garden beds toward your chosen location. It is best to position the mister near nectar-rich plants, such as salvia, bee balm, or trumpet vine, as these attract hummingbirds and provide a natural environment for them to interact with the water.
Once you reach the desired spot, use sharp pruning shears to cut the tubing to the appropriate length. Using dull tools can crush the tubing, potentially causing clogs or uneven flow. After cutting, insert the misting nozzle firmly into the end of the line. Ensure the connection is snug so the pressure does not force the nozzle off during operation.
To provide the best experience for the birds, follow these placement steps:
- Secure the tubing to a sturdy garden stake, a decorative trellis, or a low-hanging tree branch.
- Mount the nozzle at a height of 3 to 5 feet above the ground. This range mimics the natural flight height of hummingbirds and makes them feel safe while bathing.
- Angle the nozzle slightly downward or outward, away from the plant’s leaves, to prevent excessive moisture buildup that could lead to fungal issues.
Before leaving the system unattended, turn on the water slowly. Test the flow to ensure the output is a fine, consistent mist rather than a heavy stream. Hummingbirds prefer a gentle, fog-like spray that allows them to fly through and groom their feathers without being overwhelmed. If the mist is too heavy, slightly adjust the faucet valve to lower the pressure. Periodically check the nozzle throughout the season to ensure it remains free of mineral deposits or debris, which can obstruct the fine spray pattern. Proper maintenance of your irrigation components ensures a reliable water source for your local pollinators all summer long.
Safety and Best Practices
Building a hummingbird mister requires a few basic hand tools and careful attention to your home’s outdoor water system. Before you begin, ensure your workspace is clear and stable. If you are using power tools to construct a mounting stand or drill into wood, always wear safety goggles to protect your eyes from debris. Work on a flat, secure surface to maintain control over your equipment.
When connecting your mister to an outdoor faucet or irrigation line, precision is key. Check every seal and coupling for a snug fit. Loose connections not only waste water but can also lead to premature erosion of the surrounding soil or damage to your garden beds. If you notice a leak, tighten the fitting by hand or with a wrench, but avoid overtightening, which can crack plastic components.
Safety around electrical components is critical when working with water features. Follow these guidelines to prevent accidents:
- Keep all electrical outlets, extension cords, and power strips at least ten feet away from the misting area.
- Ensure your misting nozzle is angled away from any nearby exterior wall outlets or lighting fixtures to prevent short circuits.
- If you are using a solar-powered pump, ensure the battery housing is waterproof and elevated off the ground.
Regular maintenance is essential for keeping your mister functional and your hummingbirds healthy. Mineral buildup from hard water can clog nozzles, leading to increased pressure and potential leaks. Always turn off the main water supply to the mister before attempting to clean or adjust the nozzle. This prevents accidental spraying and allows you to work safely without getting soaked.
Finally, consider the ergonomics of your garden maintenance. When installing the mister, place it at a height that allows you to reach the nozzle easily for seasonal cleaning without needing a tall ladder. If you must use a ladder to mount the device, ensure it is set on level ground and have a second person stabilize it. By prioritizing these safety practices, you create a sustainable, low-maintenance environment that benefits both your garden and the local hummingbird population.

Maintenance and Troubleshooting
A hummingbird mister is a delicate piece of outdoor equipment that requires routine maintenance to function effectively. Because these systems often utilize fine-mist nozzles, they are prone to mineral buildup and debris accumulation, which can quickly compromise performance. Establishing a simple care routine will extend the life of your equipment and keep your garden visitors coming back.
To ensure consistent operation, perform a visual inspection of your mister every two weeks during the peak summer season. If you notice the spray pattern becoming uneven or the output decreasing, follow these troubleshooting steps:
- Clean the Nozzle: Use a soft-bristled brush or an old toothbrush to gently scrub the exterior of the misting head. This removes calcium deposits and algae that block water flow. If the clog persists, soak the nozzle in a solution of white vinegar and water for thirty minutes to dissolve stubborn mineral scale.
- Inspect the Tubing: Check the entire length of the hose for kinks, bends, or pinches. Even a minor restriction can significantly reduce water pressure and prevent the system from creating a fine mist.
- Clear the Filter Screen: Most mister kits include a small mesh filter at the intake point. Remove this screen and rinse it under running water to clear out sediment or organic debris that may have entered the line from your water source.
- Address Leaks: If you observe water dripping at the connection points, the seal has likely failed. Turn off the water supply, unscrew the connection, and replace the rubber washer. A fresh, properly seated washer is essential for maintaining the pressure required to produce a consistent mist.
Beyond these specific maintenance tasks, keep your garden tools and irrigation equipment organized to prevent accidental damage. When lawn care equipment or heavy garden tools are stored nearby, ensure they do not rest against the mister’s tubing, as pressure from heavy objects can cause micro-tears or permanent creases. If you live in an area with hard water, consider installing an inline water softener or filter specifically designed for garden irrigation to minimize the frequency of nozzle cleaning. By keeping the system clean and the connections tight, you ensure a reliable, refreshing oasis for hummingbirds throughout the hottest months of the year.

Dedicated team of gardening enthusiasts with years of hands-on experience testing lawn mowers, gardening tools, and outdoor equipment. We help home gardeners and professionals alike make informed buying decisions with honest, thorough reviews. From push mowers to pruning shears, we test it all so you don’t have to. Got a gardening tool you’d like us to review? Get in touch!