
Fungus gnats are a common frustration for both indoor and outdoor gardeners. This guide explains how to identify the source of a gnat infestation and provides actionable, non-toxic methods to eliminate them and protect your plants effectively. By addressing moisture levels and using simple household remedies, you can reclaim your garden space from these annoying pests quickly.
While these tiny insects are mostly a nuisance, they can indicate underlying issues with your soil or watering routine. It is important to realize that total eradication requires consistency rather than a single quick fix. Setting realistic expectations helps you manage the infestation properly while ensuring your favorite greenery remains healthy and vibrant throughout the growing season.
In the following sections, we will explore practical strategies for maintaining your garden without harsh chemicals. You will learn how to utilize essential gardening tools to improve soil aeration and discover how specific lawn care equipment can prevent damp conditions. Follow our step-by-step advice to keep your plants thriving and completely free from persistent gnat populations.
Identify the Source of the Infestation
Before reaching for chemical sprays or heavy-duty garden maintenance equipment, you must confirm that the pests hovering around your greenery are indeed fungus gnats. Misidentifying the insect can lead to ineffective treatments that waste time and potentially harm your plants. Fungus gnats are distinct from common pests like aphids or spider mites because they are primarily attracted to moisture and decaying organic matter rather than plant foliage.
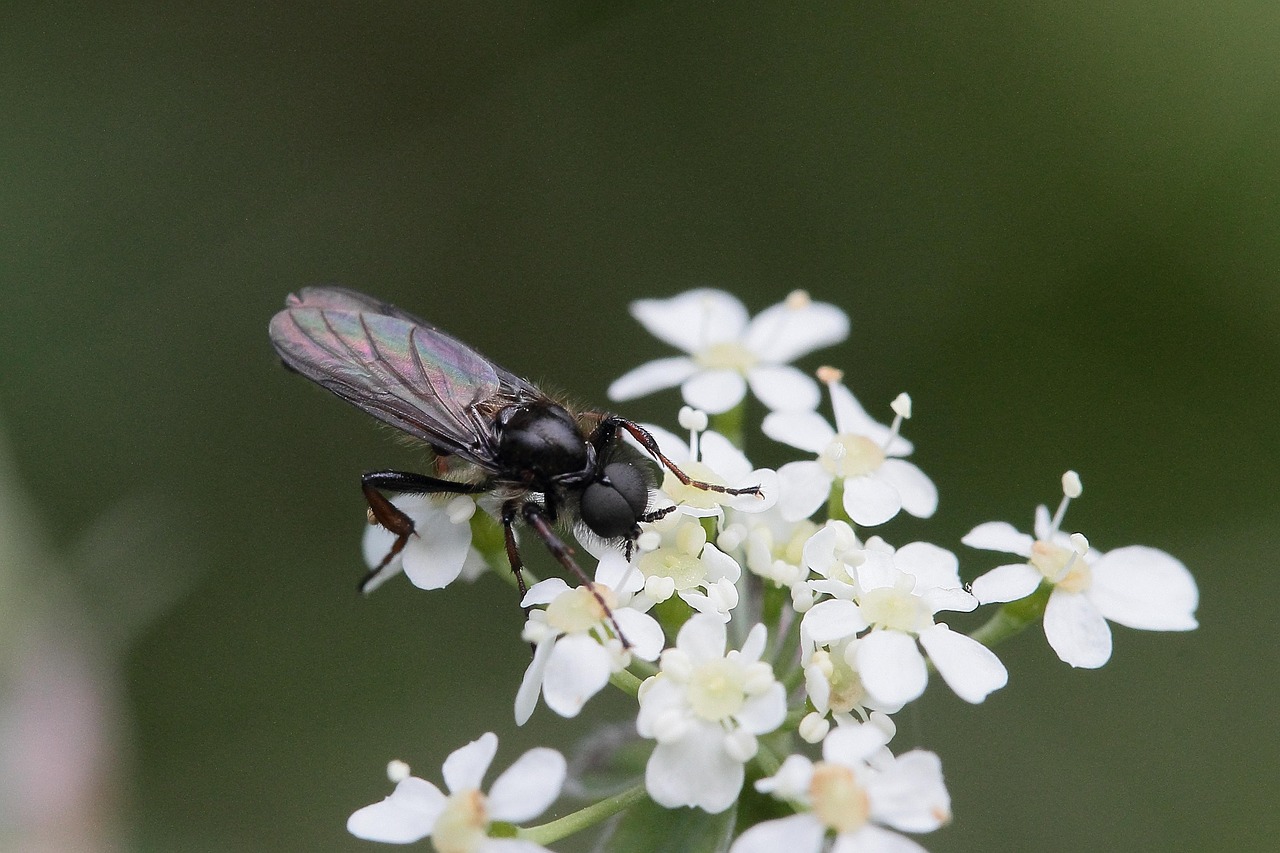
To identify a fungus gnat infestation, observe the behavior of the insects. Fungus gnats are tiny, delicate, black flies that tend to hover or crawl across the surface of the soil. They are weak fliers and are most active when you disturb the pot or water the plant. If you see small, mosquito-like insects darting around your indoor pots or garden beds, it is a strong indicator of a fungus gnat problem.
Use these simple methods to confirm the source of the infestation:
- Yellow Sticky Traps: Place small yellow adhesive cards near the base of your plants. Fungus gnats are highly attracted to the color yellow and will become stuck, allowing you to get a clear look at their size and shape.
- Soil Inspection: Gently scrape the top half-inch of the potting mix. Fungus gnat larvae are translucent, worm-like creatures with black heads that live in the top layer of damp soil.
- Potato Slices: Place a raw potato slice cut-side down on the soil surface. After 24 to 48 hours, lift the slice; if larvae are present, they will often migrate to the underside of the potato.
Fungus gnats thrive in moist, organic-rich environments. They lay eggs in damp potting mix, and their larvae feed on organic debris and delicate root hairs. If your soil remains consistently soggy, you are inadvertently creating a breeding ground for these pests. Once you have confirmed their presence, the most effective first step is to allow the top two inches of soil to dry out completely between waterings. This simple change in your care routine disrupts the life cycle of the larvae by removing their primary habitat. By identifying the source early, you can resolve the issue through cultural controls rather than relying on harsh outdoor power equipment or intensive chemical interventions.
Adjust Watering Habits to Dry Out Soil
The most effective way to break the fungus gnat life cycle is to allow the top two inches of soil to dry out completely between waterings. Adult gnats lay their eggs in damp organic matter, and the resulting larvae require consistent moisture to survive and mature. By reducing humidity in the root zone, you create an inhospitable environment that kills off the current generation of larvae and prevents new eggs from hatching.
To implement this change effectively, you must move away from rigid watering schedules. Instead, treat your garden maintenance as a responsive process based on the actual state of the soil. Before reaching for your watering can, perform a simple finger test: insert your index finger into the soil up to the second knuckle. If you feel moisture, wait another day or two before watering. If the soil is dry and crumbly, it is safe to provide water.
If you struggle to judge moisture levels by touch, consider these practical adjustments to your routine:
- Use a moisture meter: This simple hand tool provides an objective reading of the soil’s hydration level, ensuring you do not water prematurely.
- Switch to bottom watering: Place your pots in a tray of water for 15 minutes, then remove them. This allows roots to soak up moisture through drainage holes while keeping the surface soil dry, which is exactly where gnats thrive.
- Improve drainage: Ensure your pots have adequate drainage holes. If water pools at the bottom, the soil will remain saturated far too long, inviting pests.
- Add a top dressing: Once the soil has dried out, apply a thin layer of horticultural sand or fine gravel to the surface. This creates a physical barrier that prevents adult gnats from reaching the soil to lay eggs.
When you do water, ensure you are not leaving standing water in decorative saucers or cachepots. Empty these containers immediately after watering to prevent the soil from wicking up excess moisture through the bottom. By maintaining a drier surface, you effectively starve the larvae of the damp conditions they need to thrive, forcing the population to collapse naturally without the need for harsh chemical interventions.

Use Physical Barriers and Traps
When dealing with a gnat infestation, the most effective strategy involves a combination of physical traps for the adults and surface barriers to disrupt the breeding cycle. By addressing both stages of the life cycle, you can significantly reduce the population without relying solely on chemical sprays.
Yellow sticky traps are an essential tool for any gardener. Gnats are naturally attracted to the color yellow, making these traps highly effective at capturing adult insects. Place them near the base of your plants or hang them slightly above the soil surface. Beyond catching gnats, these traps serve as a vital monitoring tool; if you notice a sudden increase in the number of trapped insects, you know it is time to adjust your watering schedule or reapply soil treatments.
To stop the cycle of reproduction, you must prevent adult gnats from reaching the soil to lay their eggs. Applying a physical barrier to the top layer of your potting mix is a simple, non-toxic solution. Follow these steps for the best results:
- Remove the top half-inch of existing potting soil, as this is where larvae are most likely concentrated.
- Apply a one-quarter to one-half inch layer of horticultural-grade sand or fine decorative gravel over the surface.
- Ensure the layer is uniform, leaving no gaps that would allow gnats to burrow through to the damp soil below.
The coarse texture of sand or gravel makes it impossible for the adults to reach the moist environment they require to deposit their eggs. Once the top layer dries out, the larvae beneath will perish, effectively breaking the infestation cycle.
When selecting materials for this barrier, always prioritize quality. Use only clean, horticultural-grade sand or sterilized gravel. Avoid using sand from outdoor play areas or garden soil, as these can contain weed seeds, fungi, or existing pests that could introduce new problems to your houseplants. If you prefer a decorative look, washed aquarium gravel is a safe and effective alternative that provides the same physical blockade. By maintaining this dry, impenetrable surface, you create an environment that is inhospitable to gnats while keeping your indoor garden looking neat and well-maintained.
Apply Biological Controls and Repellents
When physical barriers and cultural adjustments fail to curb a persistent fungus gnat infestation, biological controls offer a targeted, effective solution. These methods disrupt the gnat life cycle at the larval stage, preventing the next generation of adults from emerging.
The most reliable biological control is Bacillus thuringiensis israelensis (BTI). This naturally occurring bacterium is highly specific; it targets the digestive systems of gnat larvae while remaining completely harmless to your plants, beneficial insects, pets, and humans. It is typically available in concentrated liquid or granular forms specifically designed for soil application.
To apply BTI effectively and safely, follow these professional maintenance practices:
- Read the Label: Always check the manufacturer’s instructions for the correct dilution ratio. Over-concentrating the solution does not speed up the process and may waste product.
- Protect Your Skin: Even though BTI is non-toxic to humans, handling concentrated chemicals requires caution. Always wear nitrile or rubber gardening gloves during the mixing and application process to prevent skin irritation.
- Ensure Even Coverage: Use a watering can to apply the diluted solution to the top layer of the soil. The goal is to saturate the area where larvae reside without causing waterlogged roots.
- Repeat as Necessary: Because BTI only affects larvae, a single application may not catch eggs that hatch later. Plan for a series of treatments spaced seven to ten days apart to break the cycle entirely.
For those who prefer a repellent approach, neem oil is a popular choice for garden maintenance. When applied as a soil drench, neem oil acts as an insect growth regulator. It prevents larvae from developing and feeding, eventually leading to a collapse of the gnat population.
Regardless of the product chosen, consistency is key. Keep your gardening tools and mixing containers clean to prevent cross-contamination between healthy and infested plants. If you are managing a large collection, isolate affected pots from the rest of your indoor garden until you are certain the infestation has been eradicated. By combining biological controls with vigilant monitoring, you can protect your plants from damage without relying on harsh, synthetic pesticides that could compromise your home environment.

Follow-up Care and When to Seek Help
Eliminating an active gnat infestation is only the first step in protecting your garden. Because fungus gnats lay eggs in the top layer of soil, new generations can hatch even after you have treated the adult population. You must remain vigilant for at least three to four weeks following your initial intervention to ensure you have broken the life cycle completely.
Continue to monitor your plants closely during this period. Check the soil surface regularly for signs of adult activity and inspect the undersides of leaves for any lingering pests. Proper garden maintenance is your best defense against a resurgence. Ensure your watering schedule allows the top two inches of soil to dry out between sessions, as consistently damp soil creates the ideal environment for larvae to thrive.
If you notice the following signs, your infestation may be more severe than a standard home remedy can handle:
- Sudden yellowing or wilting of leaves despite adequate moisture.
- Stunted growth or a lack of new foliage.
- Visible damage to the root system when checking the soil.
- A persistent, high volume of gnats that does not decrease after multiple treatments.
In these instances, the issue may have progressed to root rot or a systemic infestation that requires specialized equipment or professional-grade treatments. Before applying harsh chemicals, which can damage your soil health and surrounding plants, reach out to a local agricultural extension office. These organizations provide science-based, regional advice tailored to your specific climate and plant varieties.
If you are managing a large-scale garden or high-value landscape plants, consider consulting a certified arborist or a professional plant health specialist. They have the expertise to diagnose underlying soil health issues and can recommend targeted, safe interventions that protect your garden’s long-term vitality. Remember, healthy soil and proper drainage are the most effective tools in your gardening shed; keeping your equipment clean and your tools sanitized also prevents the accidental introduction of pests into new areas of your home. By staying proactive and knowing when to call in the experts, you can maintain a thriving, pest-free garden throughout the growing season.

Dedicated team of gardening enthusiasts with years of hands-on experience testing lawn mowers, gardening tools, and outdoor equipment. We help home gardeners and professionals alike make informed buying decisions with honest, thorough reviews. From push mowers to pruning shears, we test it all so you don’t have to. Got a gardening tool you’d like us to review? Get in touch!